Real-Time Processing with AAX
Quick Start Guides for DAWs » Quick Start Guide for Pro Tools » Real-Time Processing with AAX
- The Plugin Window
- Removing RePitch plugin instances
- Selecting a Scale
- Applying a Macro
- Capturing Audio
- Snap Notes to Measured Scale
- Manual Editing
- Switching Macros
- Resizing the RePitch Elements window
This section describes basic use of the RePitch Real-time plugin in Pro Tools. If you are using Pro Tools 2024.06 or newer, we recommend using the ARA workflow described here.
You can follow this section as a step-by-step guide.
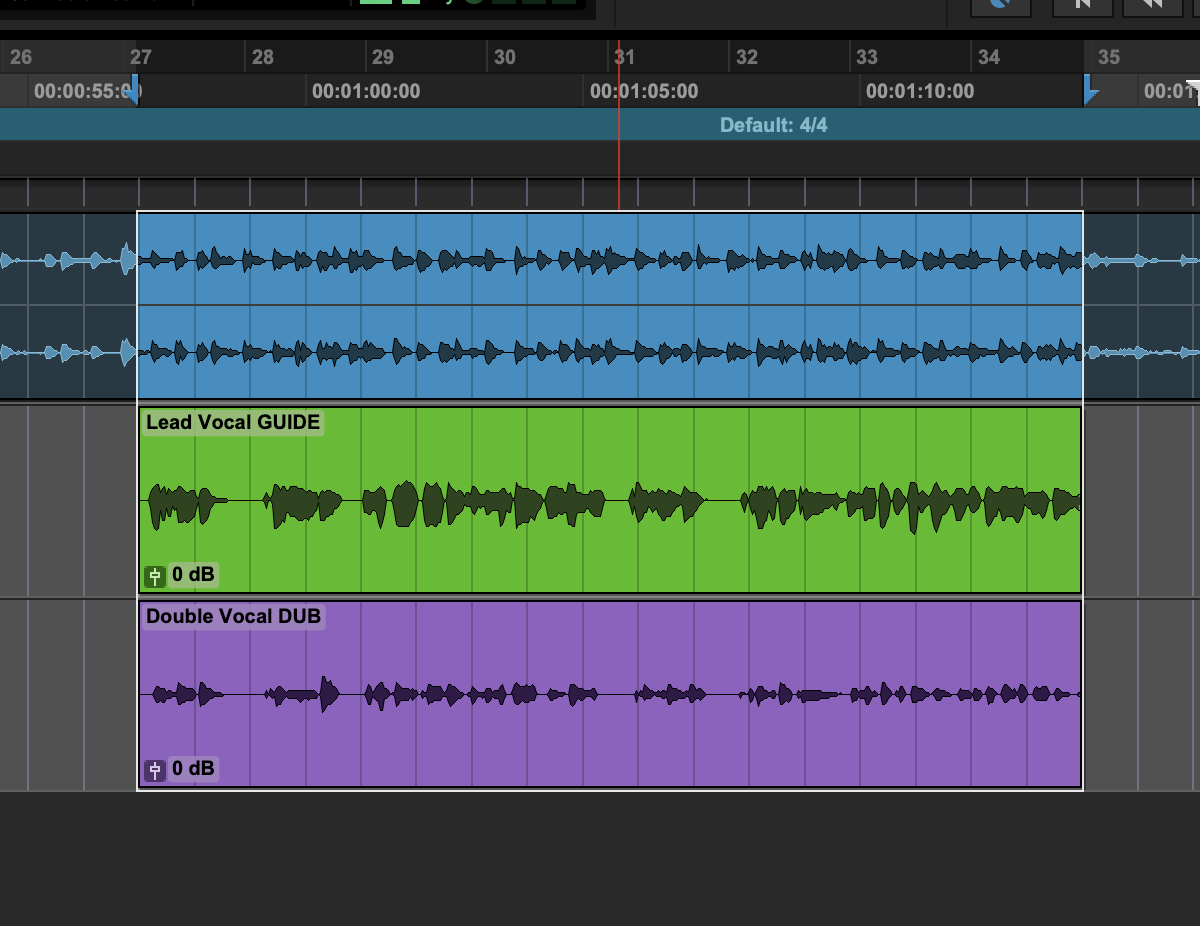
We will work with a generic track called 'Lead Vocal' shown below. You can use the instructions that follow to work with any track in your project.

Overall Workflow
When working with RePitch Elements, we will generally follow the below steps:
- Instantiate the plugin
- Choose settings (Scales, Macros)
- Capture Audio
- Check our results
The next sections will take us through this workflow.
Instantiating RePitch Elements
To access RePitch Elements in Pro Tools, we add it as an insert on the track that contains the audio we would like to work with. Here, we will add RePitch Elements to the Lead Vocal track. The empty insert slot is indicated by the red arrow.

Clicking in the indicated empty insert slot will open the plugin menu, where we can select RePitch.
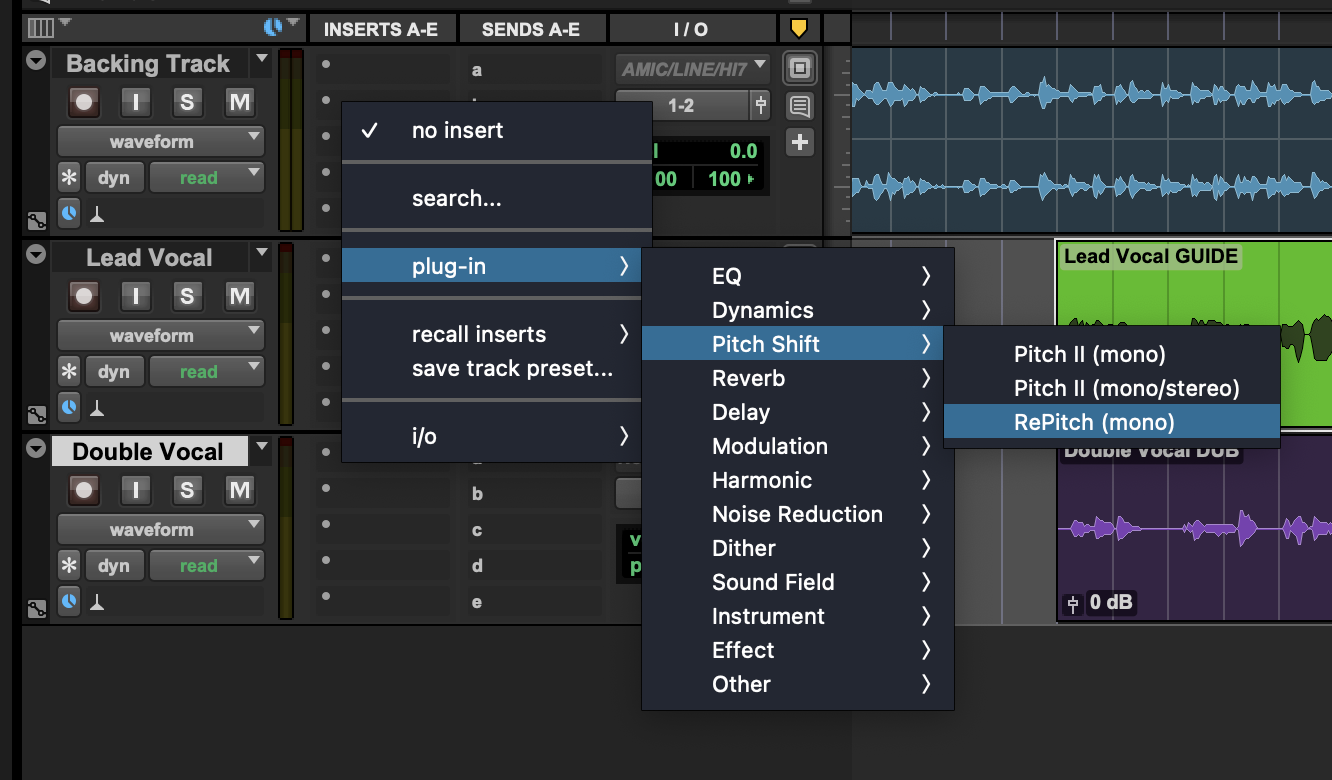
Selecting RePitch will instantiate the plugin in the empty insert slot and open the plugin instance.
The Plugin Window
The RePitch plugin window will automatically open and should look similar to the below image. RePitch is ready but does not yet contain any audio for us to modify.
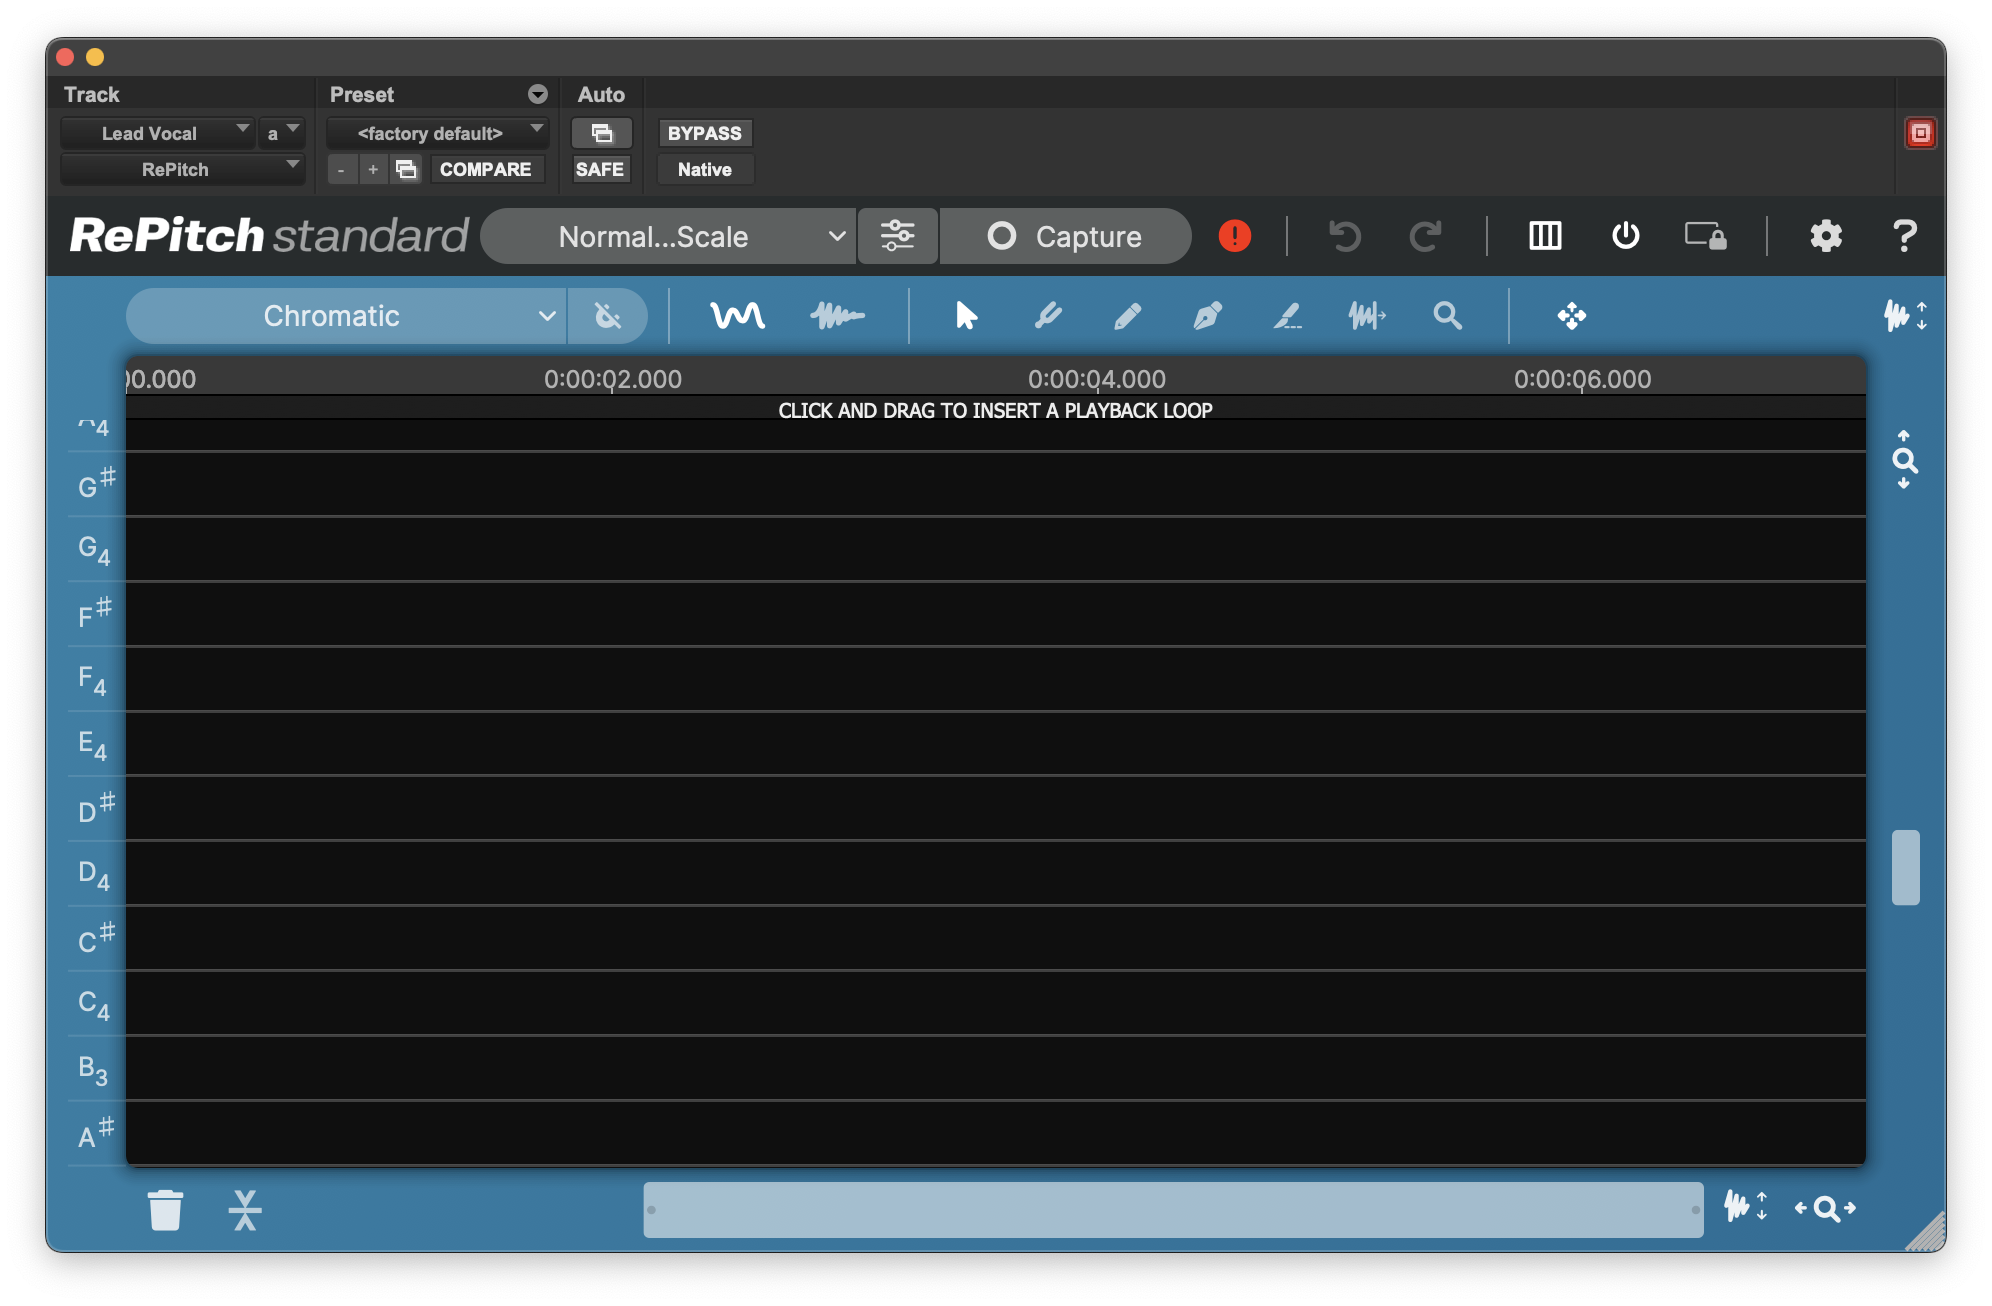
If it does not appear, you can click the RePitch insert to open it.
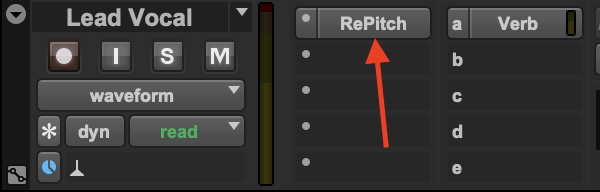
Removing RePitch plugin instances
RePitch can be removed just like any other insert effect in Pro Tools. First, click the left side of the insert slot that contains RePitch, as circled in red in the below image.

Next, select 'No Insert' from the top of the menu.

Selecting a Scale
Prior to Capturing our audio, we will select a Scale and a Macro. This way, when we capture our audio, RePitch Elements will immediately apply our desired settings.
In order to quickly tune our selected vocal, we will use one of RePitch Elements' built in Macros.
First, we will select the Chromatic scale from the Scale menu in RePitch Elements. Click the 'Scale' box in the top left of the user interface, circled in red below.
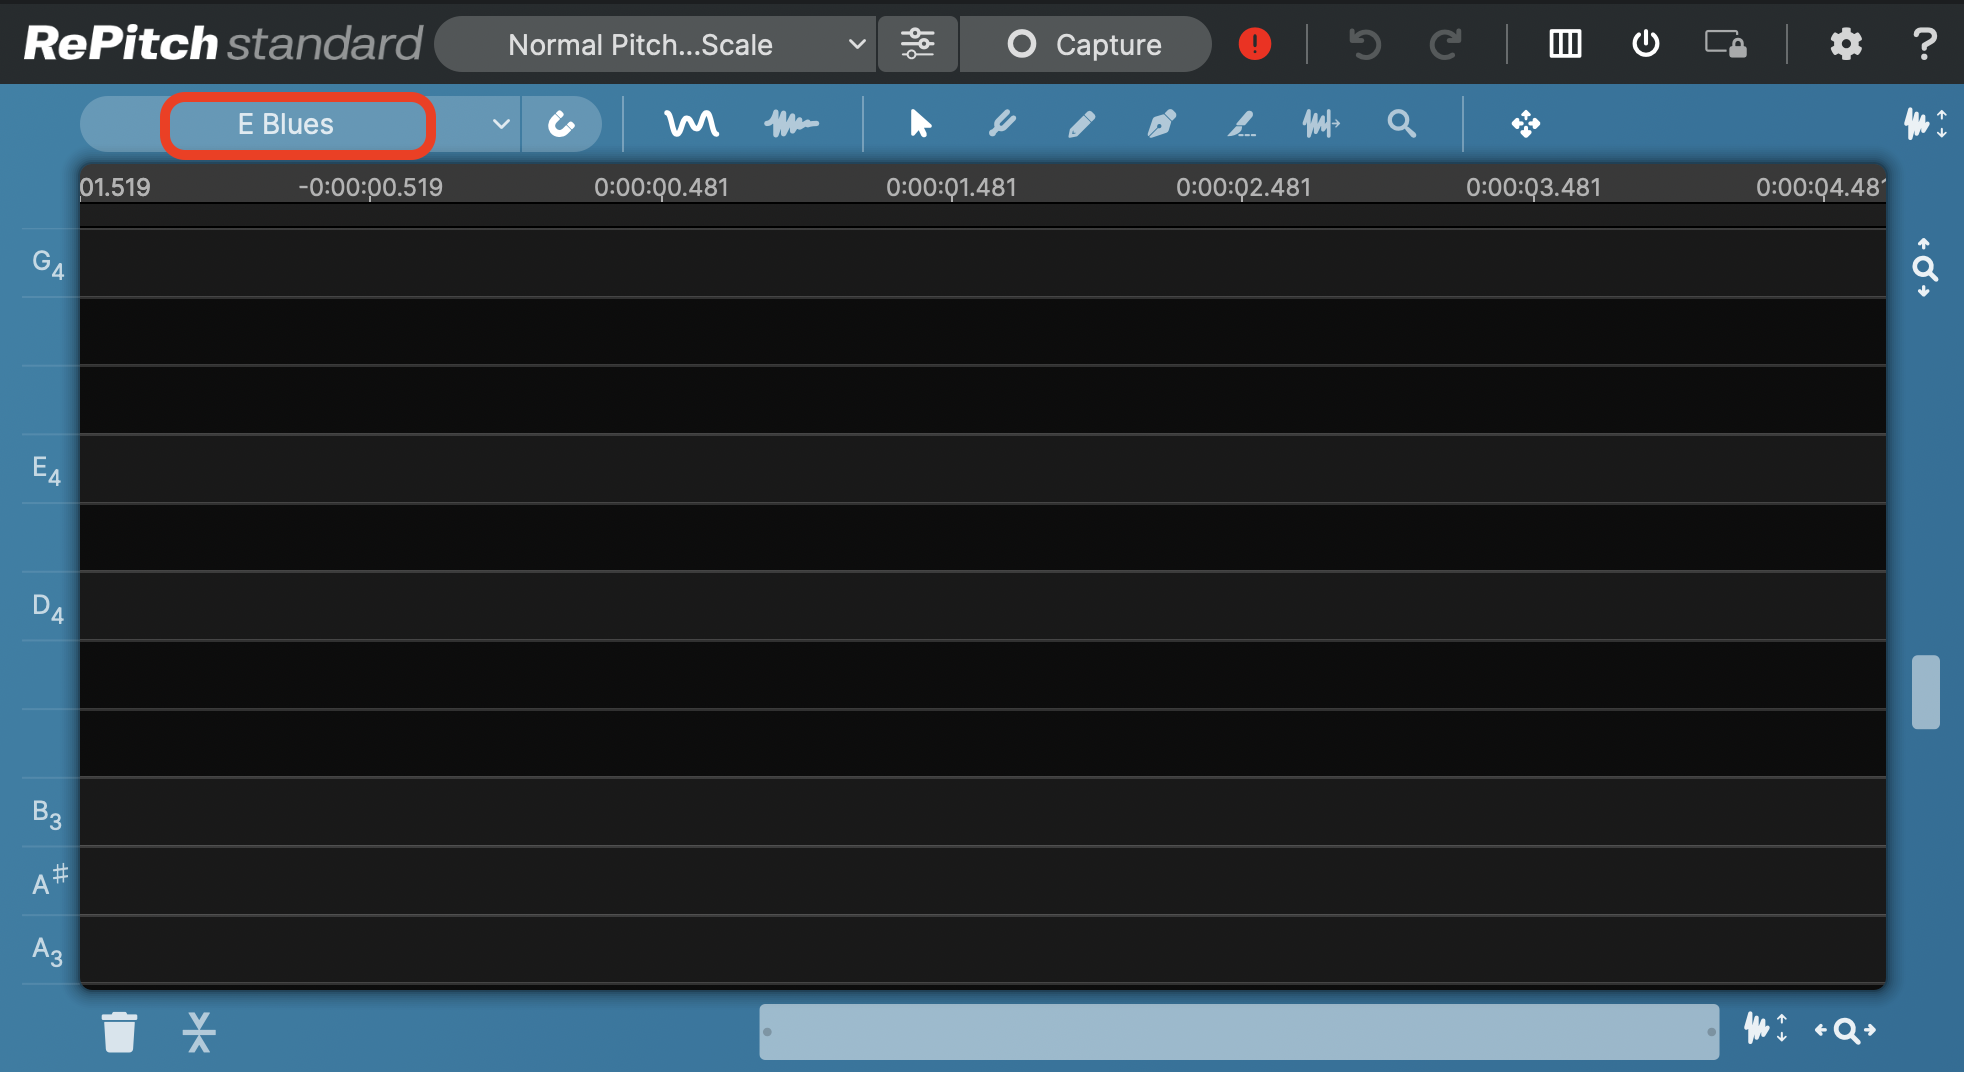
Clicking the drop down menu will show our current available scales. You can select the 'Scales...' item to add scales to this list later. For now, choose Chromatic.

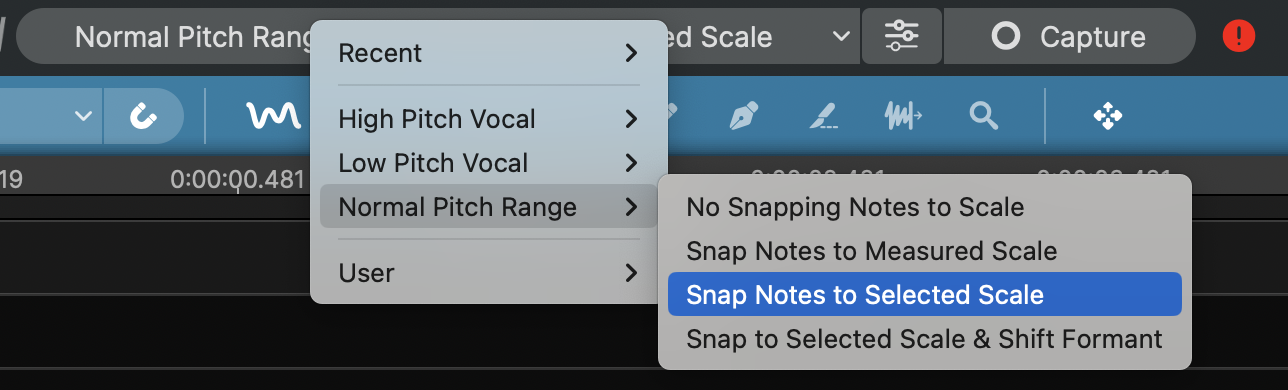
Applying a Macro
Next, select a Macro from the Macro drop down menu. The Macro menu is at the top of the RePitch Elements plugin window, highlighted below in red.

From the drop down, we'll select 'Normal Pitch Range > Snap Notes to Selected Scale'. This will tune our audio to the nearest chromatic pitch. If your audio is in a particularly low or high pitch range, select the corresponding sub-menu, and select the 'Snap Notes to Selected Scale' option.
Capturing Audio
In the real-time versions of RePitch Elements, we need to Capture our audio before we can work with it. Before Capturing your audio, we suggest setting up a loop around the audio that you would like to capture. This will make it easier to capture the audio, and to listen back to the results after processing is applied.
To begin the Capture process, we will first click the Capture button at the top of the user interface to arm RePitch Elements for recording. The Capture button is indicated in the below image by a red arrow.

The Capture button will now change to a red square and say 'Stop'. This indicates that RePitch Elements is armed and ready to capture any incoming audio.

We can now press our Spacebar to start playback in Pro Tools. RePitch will begin capturing any incoming audio, shown by the grey waveform that is drawn in behind the advancing playback marker (the vertical yellow line). Keep playing the audio until everything you would like to work with has been captured.
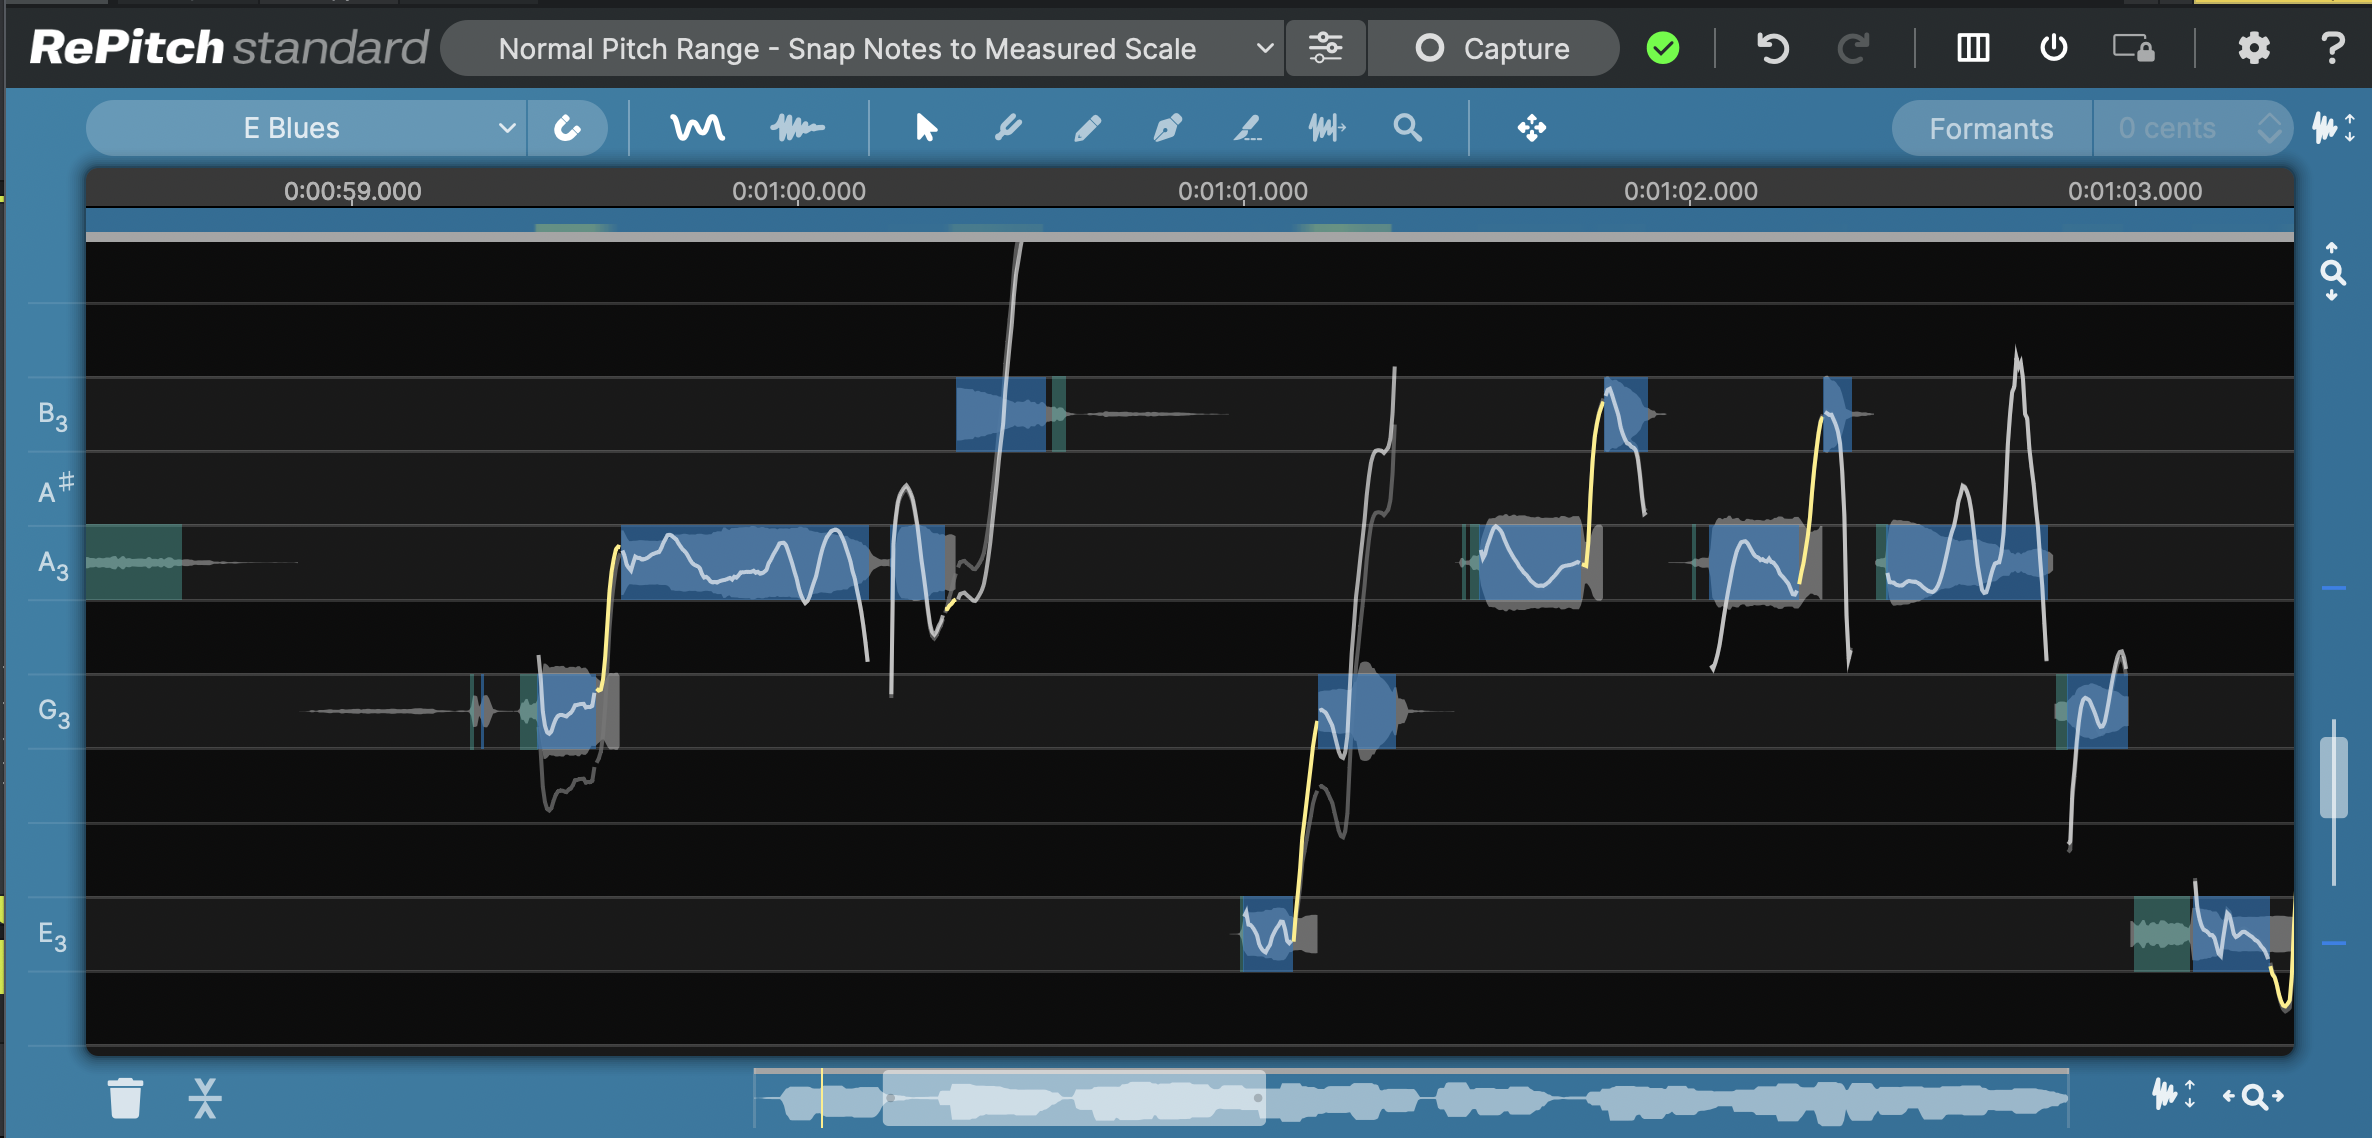
Once your audio has played back and been captured, press the spacebar again to stop playback in Pro Tools. RePitch Elements will immediately apply the selected Scale and Macro processing to our audio clip.
In the below image, RePitch Elements has processed some captured audio based on the currently selected Macro, so the blue note blocks are shown automatically centered (tuned) in the Note Lanes of the Chromatic Scale.
The white lines show the new pitch pattern and the faint grey pitch lines show the original pitch.
More Macro and Scale Options
Before capturing your audio, or once it is already captured, you could also select any of the below options depending on your desired workflow.
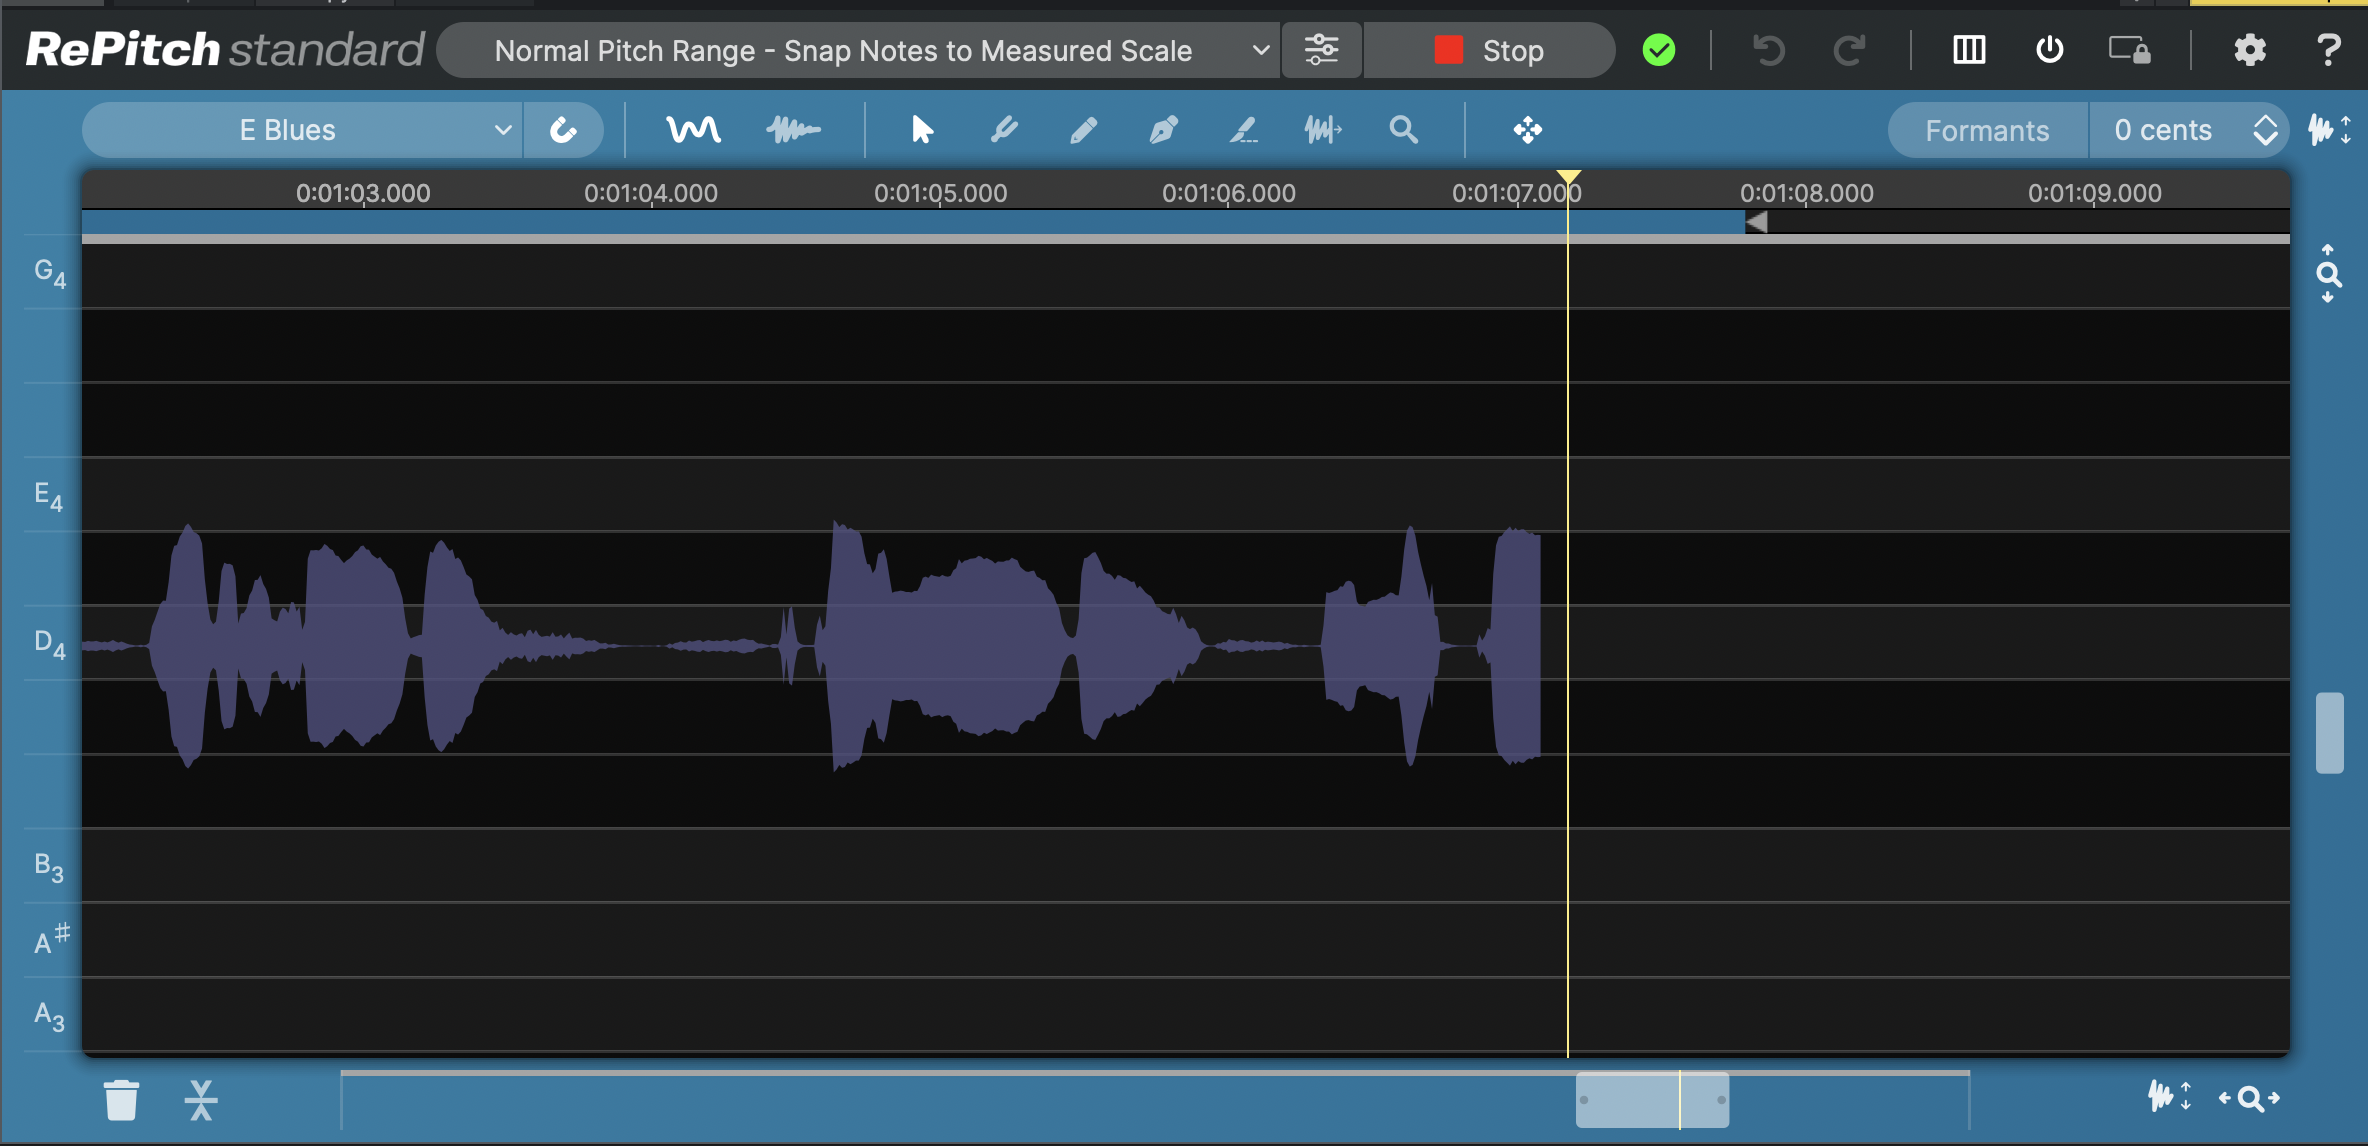
Snap Notes to Measured Scale
You could have also chosen the Macro ' Normal Pitch Range - Snap Notes to Measured Scale'.
This Macro would automatically detect the most likely tonic and scale from the notes in your audio track, and then move the detected note blocks in your audio to that Measured (i.e. detected) scale's note frequencies.
If you want to add your own Scale to be selected and tuned to, simply click the Scale display control shown below

and when this menu opens

Click Scales... and you'll see the window below

In the line that says Scale at the left, click the drop down menus to add your Tonic and Scale Mode and then click Add and then Save.
Your added scale should now be in the Scale window.
Now make sure the Macro is set to Snap Notes to Selected Scale and all further audio captures will use that scale and Macro automatically.
Manual Editing
Generally, you'll want to select one of two primary automatic tuning options above. However, the 'No Snapping Notes to Scale' macro shown below applies no automatic processing, leaving you free to make manual changes.

The controls for manual changes are discussed in detail in the Pitch Editing Tools and Time Modiciation Tools sections.
It's important to understand that once you've selected a Macro, you can change the Macro or Scale before you use it on the next captured audio or before you re-run the new Macro on the captured audio.
Switching Macros
If you have already run a Macro, switching to another Macro and running it by clicking "yes" in the window below will always discard all existing processing, so you will see the confirmation dialog below

If you’ve not done any manual editing or want to start over, click YES.
If you click NO, you will see the changes made on screen, which will show the Scale and setting to be used in the next application of RePitch Elements' processing, whether with a Macro or Right Click menu.
Macros are described further in this section.
Resizing the RePitch Elements window
If RePitch Elements is unpinned from the Edit section of your DAW interface, you can resize it to almost any size by dragging the corners or edges of the plug-in window.
Copyright © 2023 by Synchro Arts Ltd All Rights Reserved.