VocAlign Ultra Quick Start Guide for Pro Tools AAX Plug-in
Quick Start for Pro Tools using AAX (AudioSuite)
Overview
In this Quick Start Guide, you will learn how to set up Pro Tools and VocAlign Ultra to transfer audio into VocAlign Ultra, process that audio, and have the processed output returned to Pro Tools.
The procedure might seem a little complex at first, because you have to tell the plugin which track contains the Guide and which track(s) need their timing and/or pitch adjusted by VocAlign Ultra to match the Guide's.
We won’t go into details on the control panels or displays here, as those are described in the 'Using VocAlign Ultra' sections of the main User Guide shown on the left.
One last note: because we started long ago in the film industry, we call the audio to be modified and output the “Dub”.
Before we let you do the work, here's a video that gives you the basic steps you are going to learn.
[Updated video for VocAlign 1.1 in Pro Tools with SmartAlign workflow forthcoming]
Installation and Initial Setup
-
You should have already downloaded, installed and authorised the VocAlign Ultra plug-in on your computer.
See Installation and Authorization if you haven't. - Download the 'No Holding Back' Pro Tools Session and follow along with the operational instructions below.
- Note that VocAlign Ultra is not a real-time plugin, so it doesn't appear in channel inserts. It can only be found in the AudioSuite menu.
Let's Start Processing
Here, we’ll describe the VocAlign Ultra workflow steps of selecting a preset, capturing the Guide and Dub signals from Pro Tools, processing the Dub audio and sending the processed Output back to Pro Tools. We're using the 'No Holding Back' Session that you should have downloaded. We'll also look at changing presets and settings.
- In Pro Tools, open the ‘No Holding Back' Session (download link is given above).
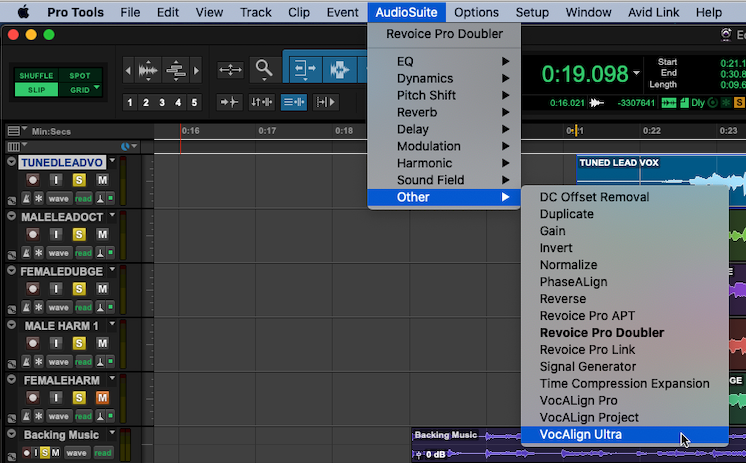
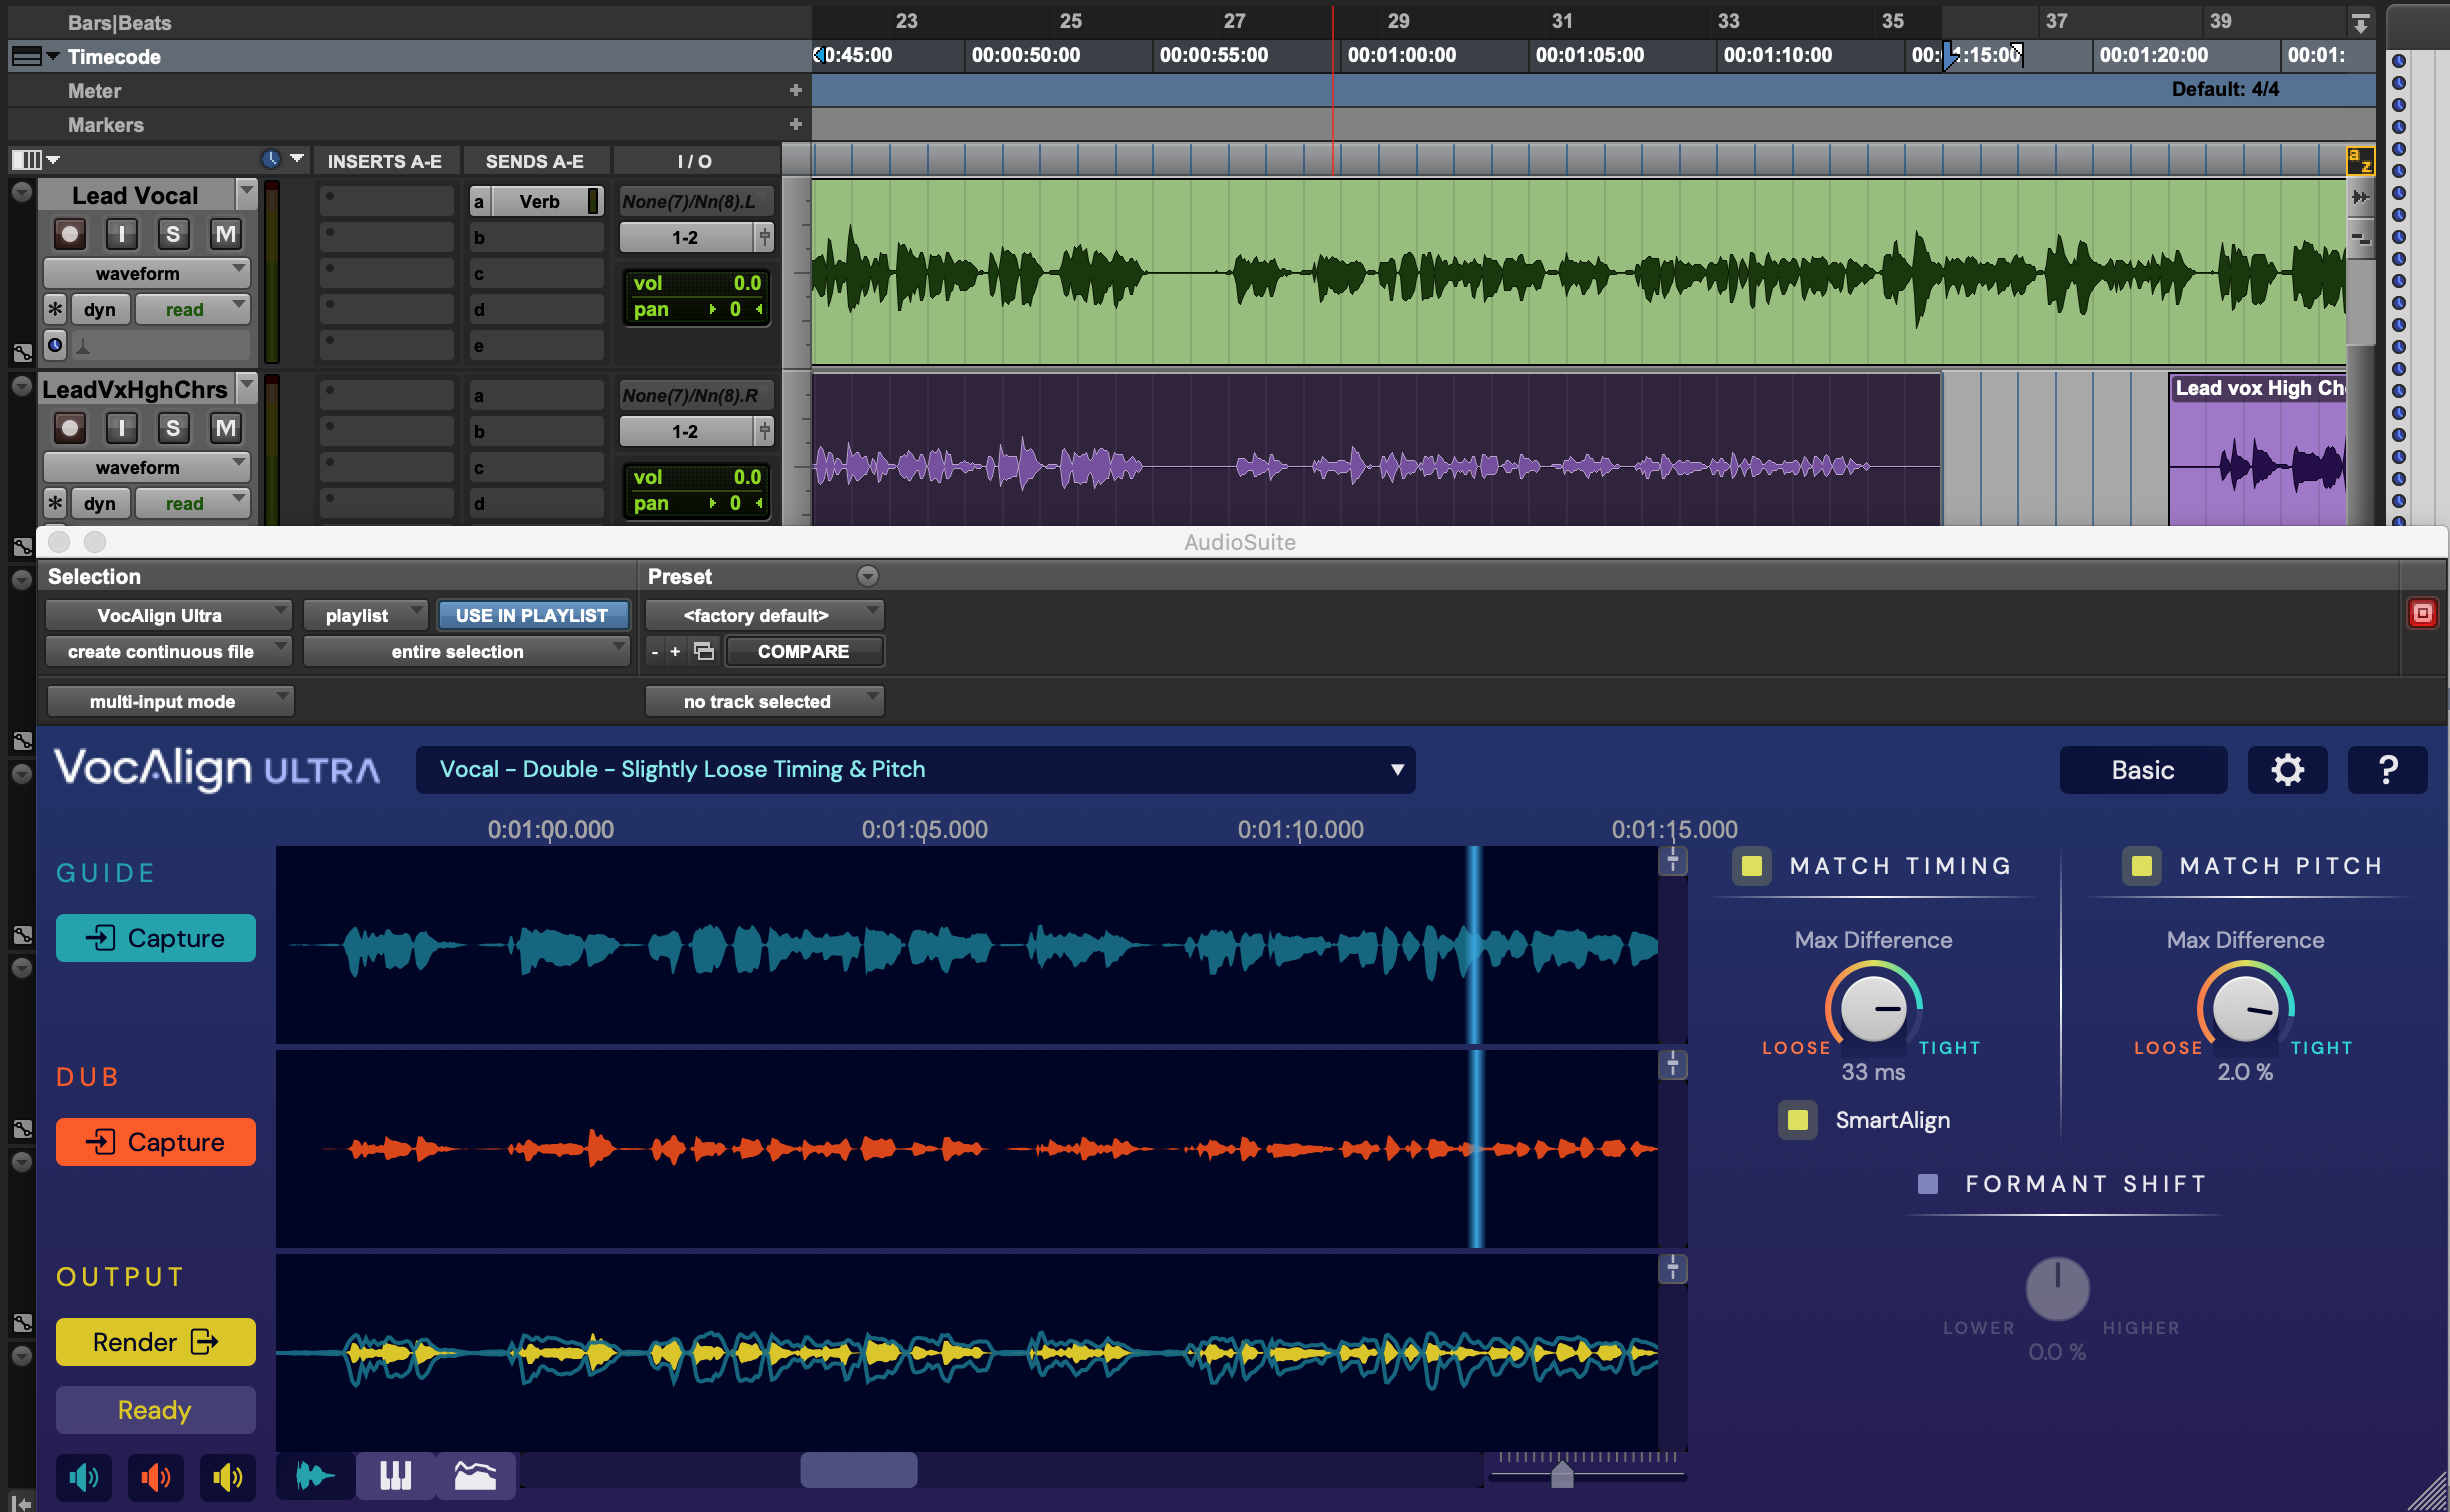
- Load the VocAlign Ultra plugin by opening Pro Tools’ AudioSuite menu, selecting the Other submenu, then selecting VocAlign Ultra as shown below.
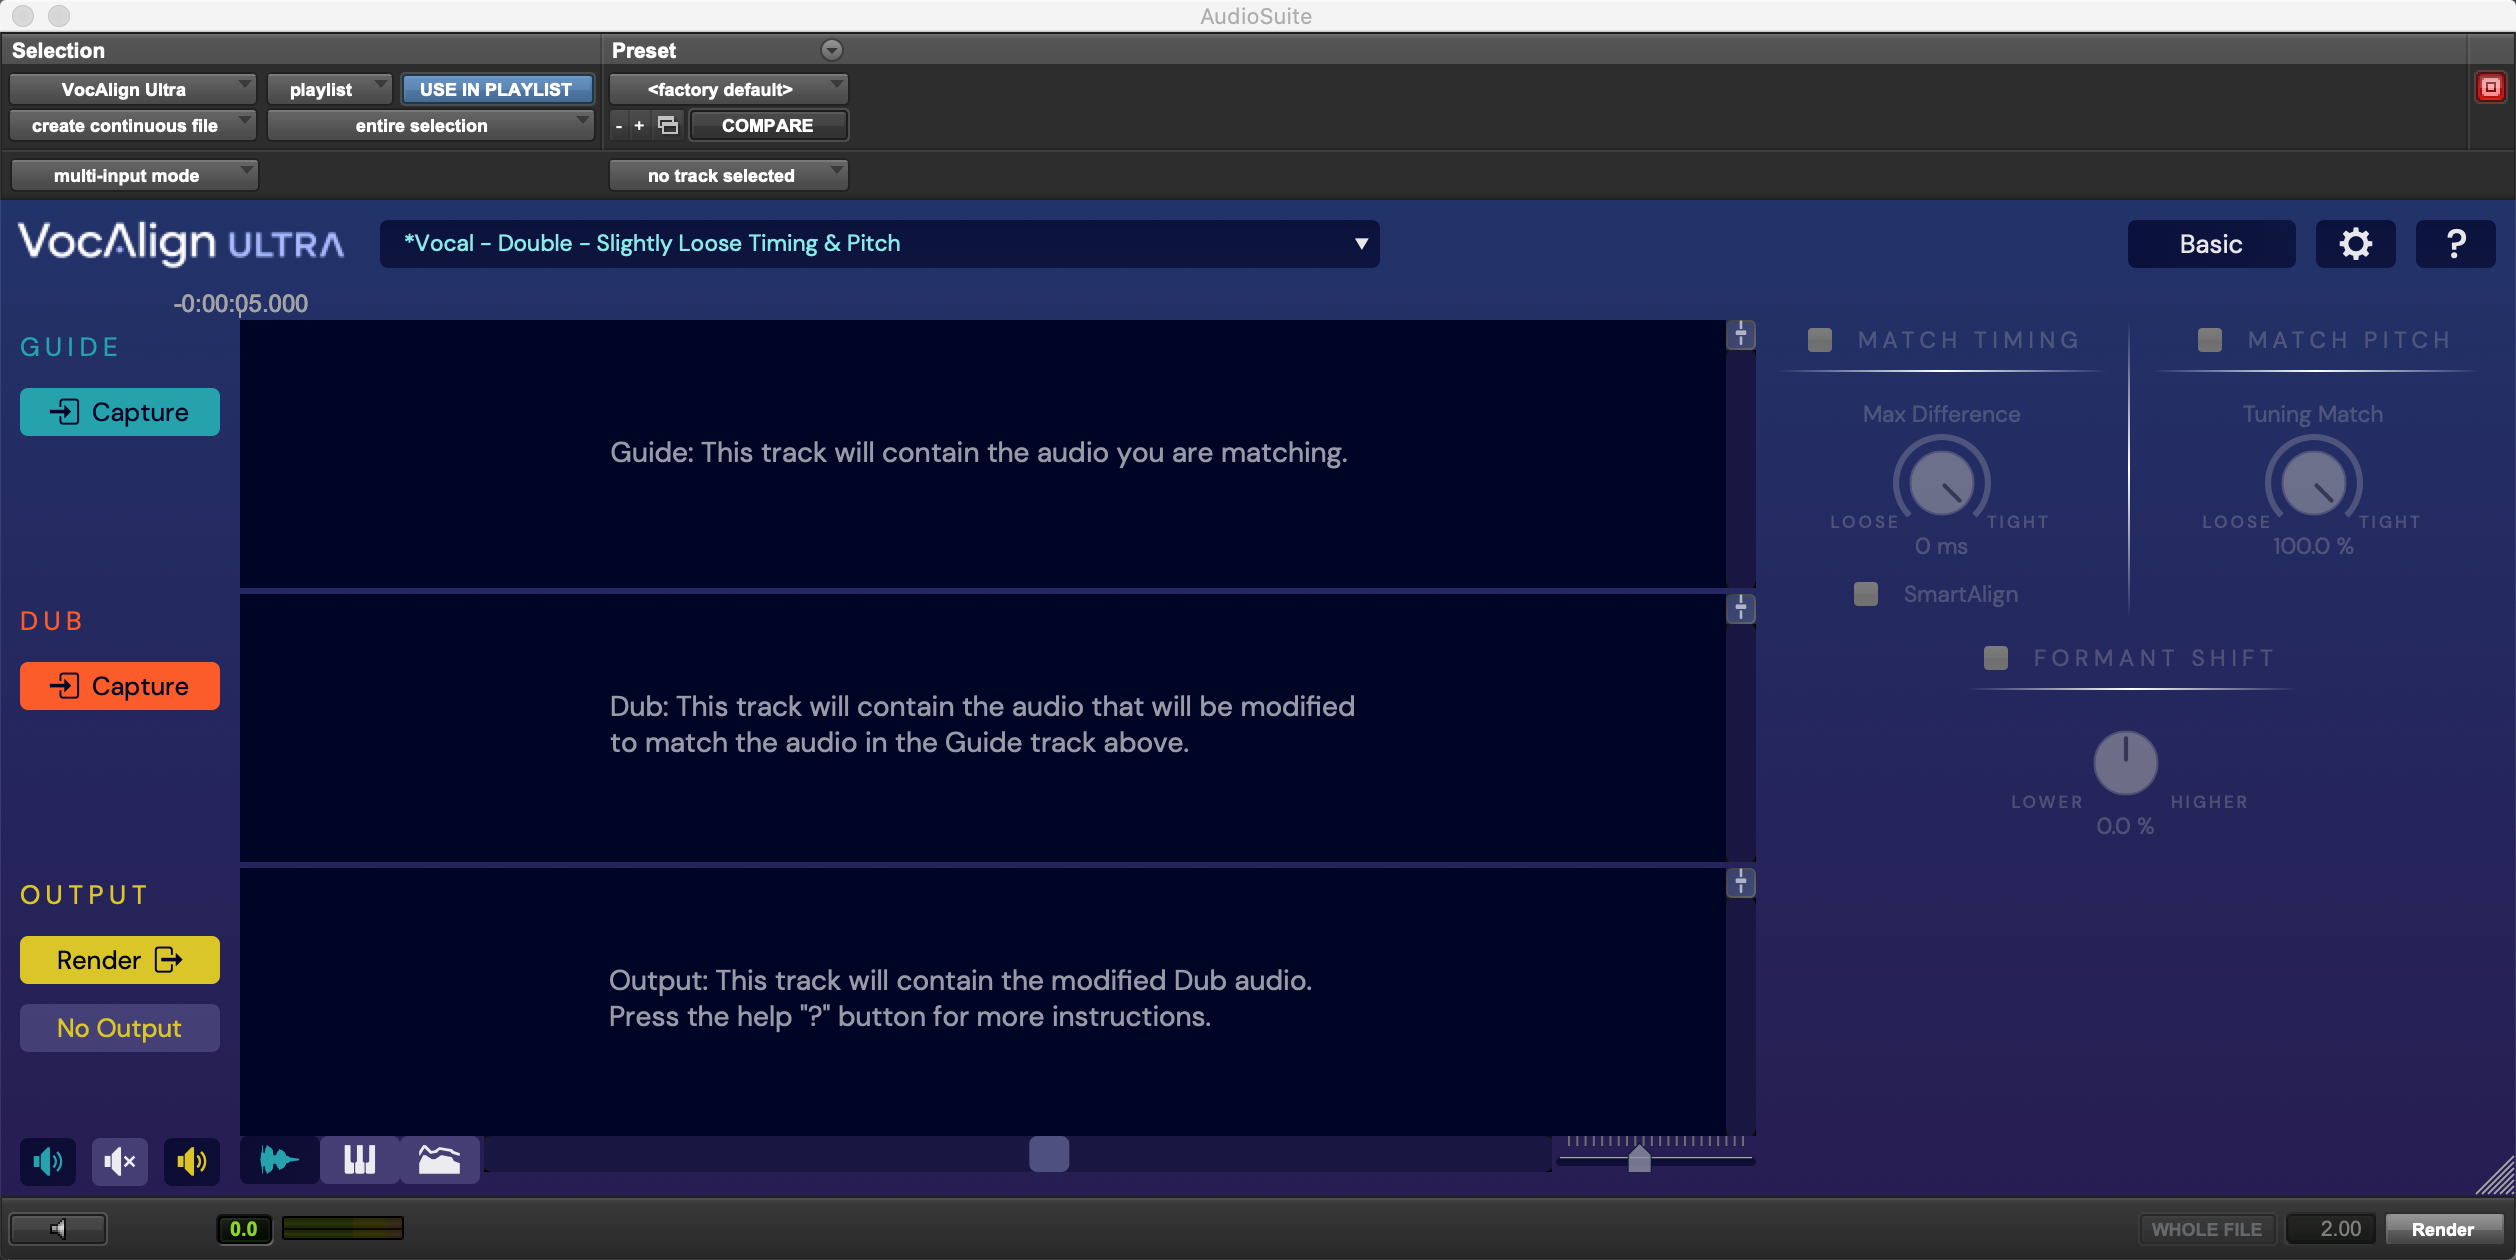
- VocAlign Ultra should open and look similar to the picture below.
NOTE: You can drag the triangle in the bottom right corner to scale the width and height of the plug-in window.
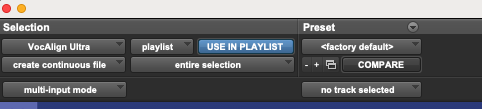
- In the AudioSuite menu at the top of the plugin, make sure USE IN PLAYLIST is activated, as shown below.
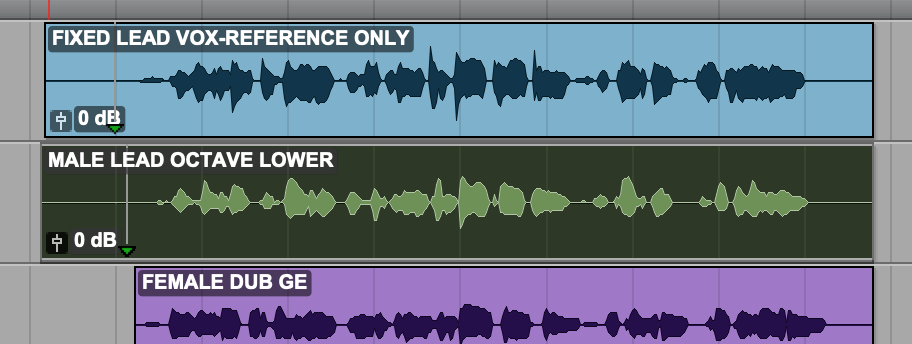
- Play each of the tracks in the Session against the 'Tuned Lead Vox' track to get an idea of what the parts sound like and what needs to be done to them.
Process your first Guide and Dub with SmartAlign
- In Pro Tools, select the 'Tuned Lead Vox' clip shown in the picture below. This will be our Guide audio.
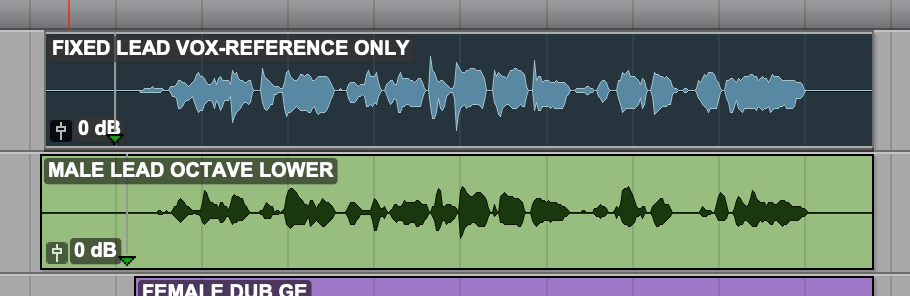
- In VocAlign Ultra, click the Guide Capture button to load the selected audio signal into the Guide section, as shown below. The outline of the Guide waveform is also shown in the Output track as a timing reference.

- In Pro Tools, select the clip ‘MALE LEAD OCTAVE LOWER’ as shown in picture below. This will be the Dub audio. When working with SmartAlign, the start times of the Guide and Dub clips do not need to be the same.
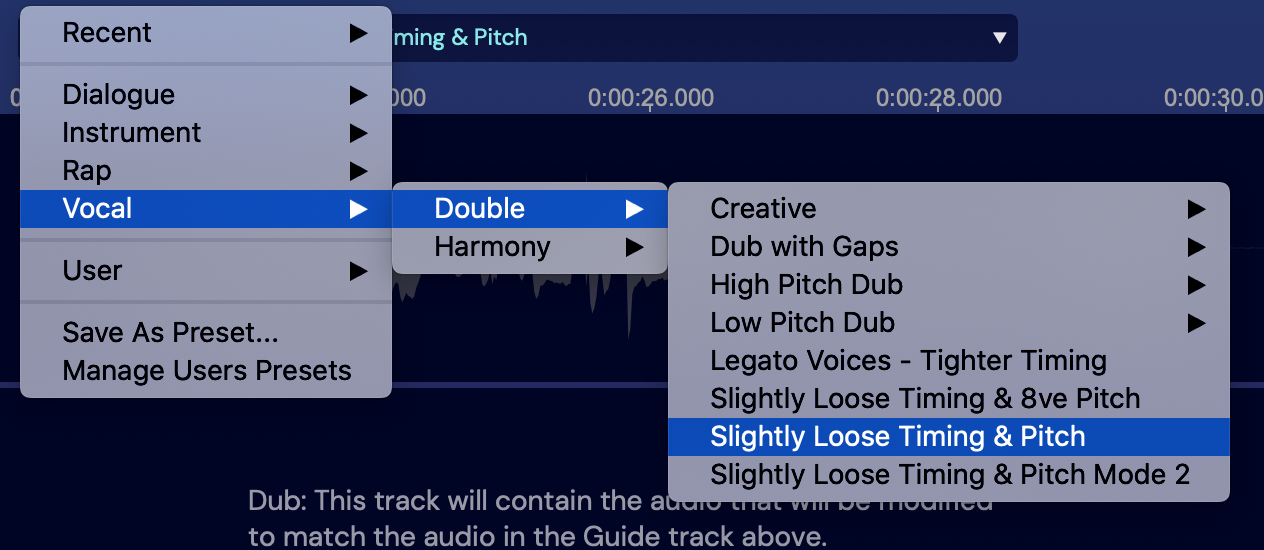
- The second track is a double of the first (even though they're an octave apart), so in VocAlign Ultra, select the Vocal – Double – Slightly Loose Timing & Pitch preset before Capturing the Dub. This ensures that the Dub will be processed with this setting as soon as it is Captured.
In VocAlign Ultra, click the Dub Capture button to load the selected signal into the Dub section and automatically process the Dub based on the control settings established by the Preset.
(Note: If this is the first time you have run VocAlign Ultra, it will turn on the process controls before processing)
Process your first Guide and Dub without SmartAlign
If for some reason you need to disable SmartAlign, you can follow the above instructions, but instead of selecting a clip, you will need to highlight a region of that clip as shown below. Make sure the highlighted region in the Dub roughly corresponds with the highlighted region of the Guide.
TIP: Press the ; key to shift the selection range down from the track above. If required you can Press P to shift selection up.
 | Note: It is a good idea to leave similar amounts of silence ahead of the Guide and Dub. |
Auditioning and Rendering the Output
| Note: At this point, the audio has been processed but not yet returned to Pro Tools. |
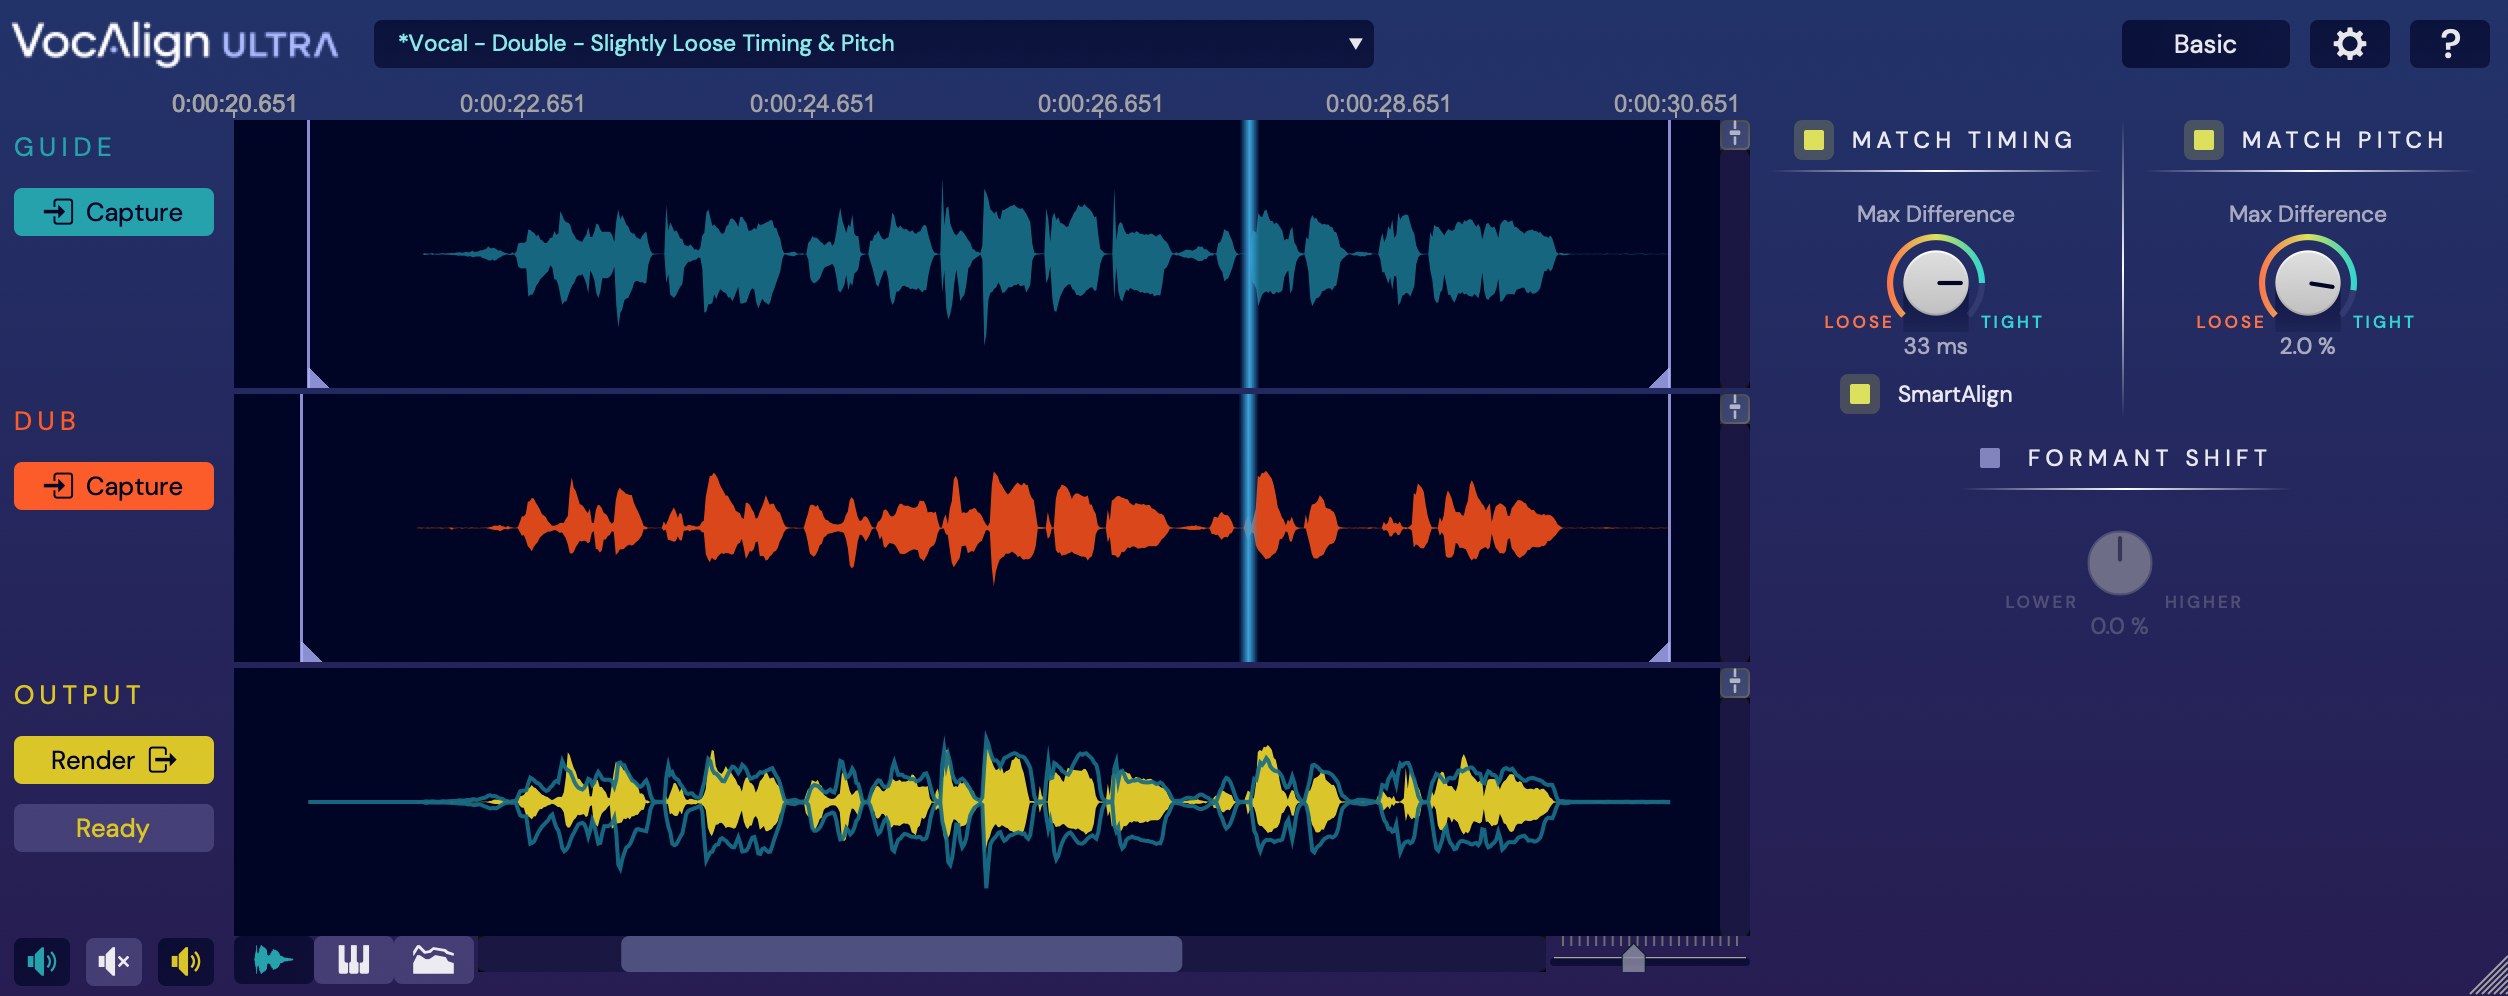
The Dub and Output (processed Dub) signal waveforms appear as shown below, and the parameters to the right are activated and applied.
The Output display at the bottom shows the processed signal waveform overlaid with an outline of the Guide’s waveform for timing accuracy reference.
The light blue lines follow the mouse pointer along the waveforms to show the calculated offset between matching features of the Guide and Dub that the settings are aligning.

You now have three Options:
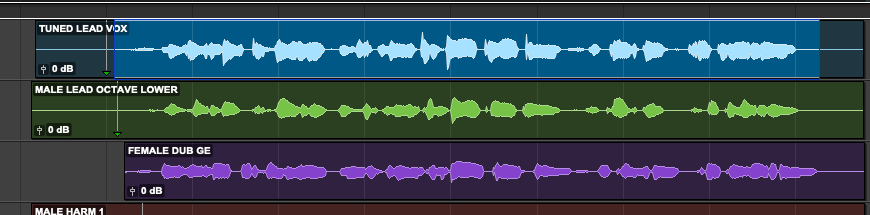
- Press VocAlign Ultra's Render button to render the output over the original Dub, or select an empty track and audition the processed audio in Pro Tools. Here, we've returned the processed audio to the same track it came from.

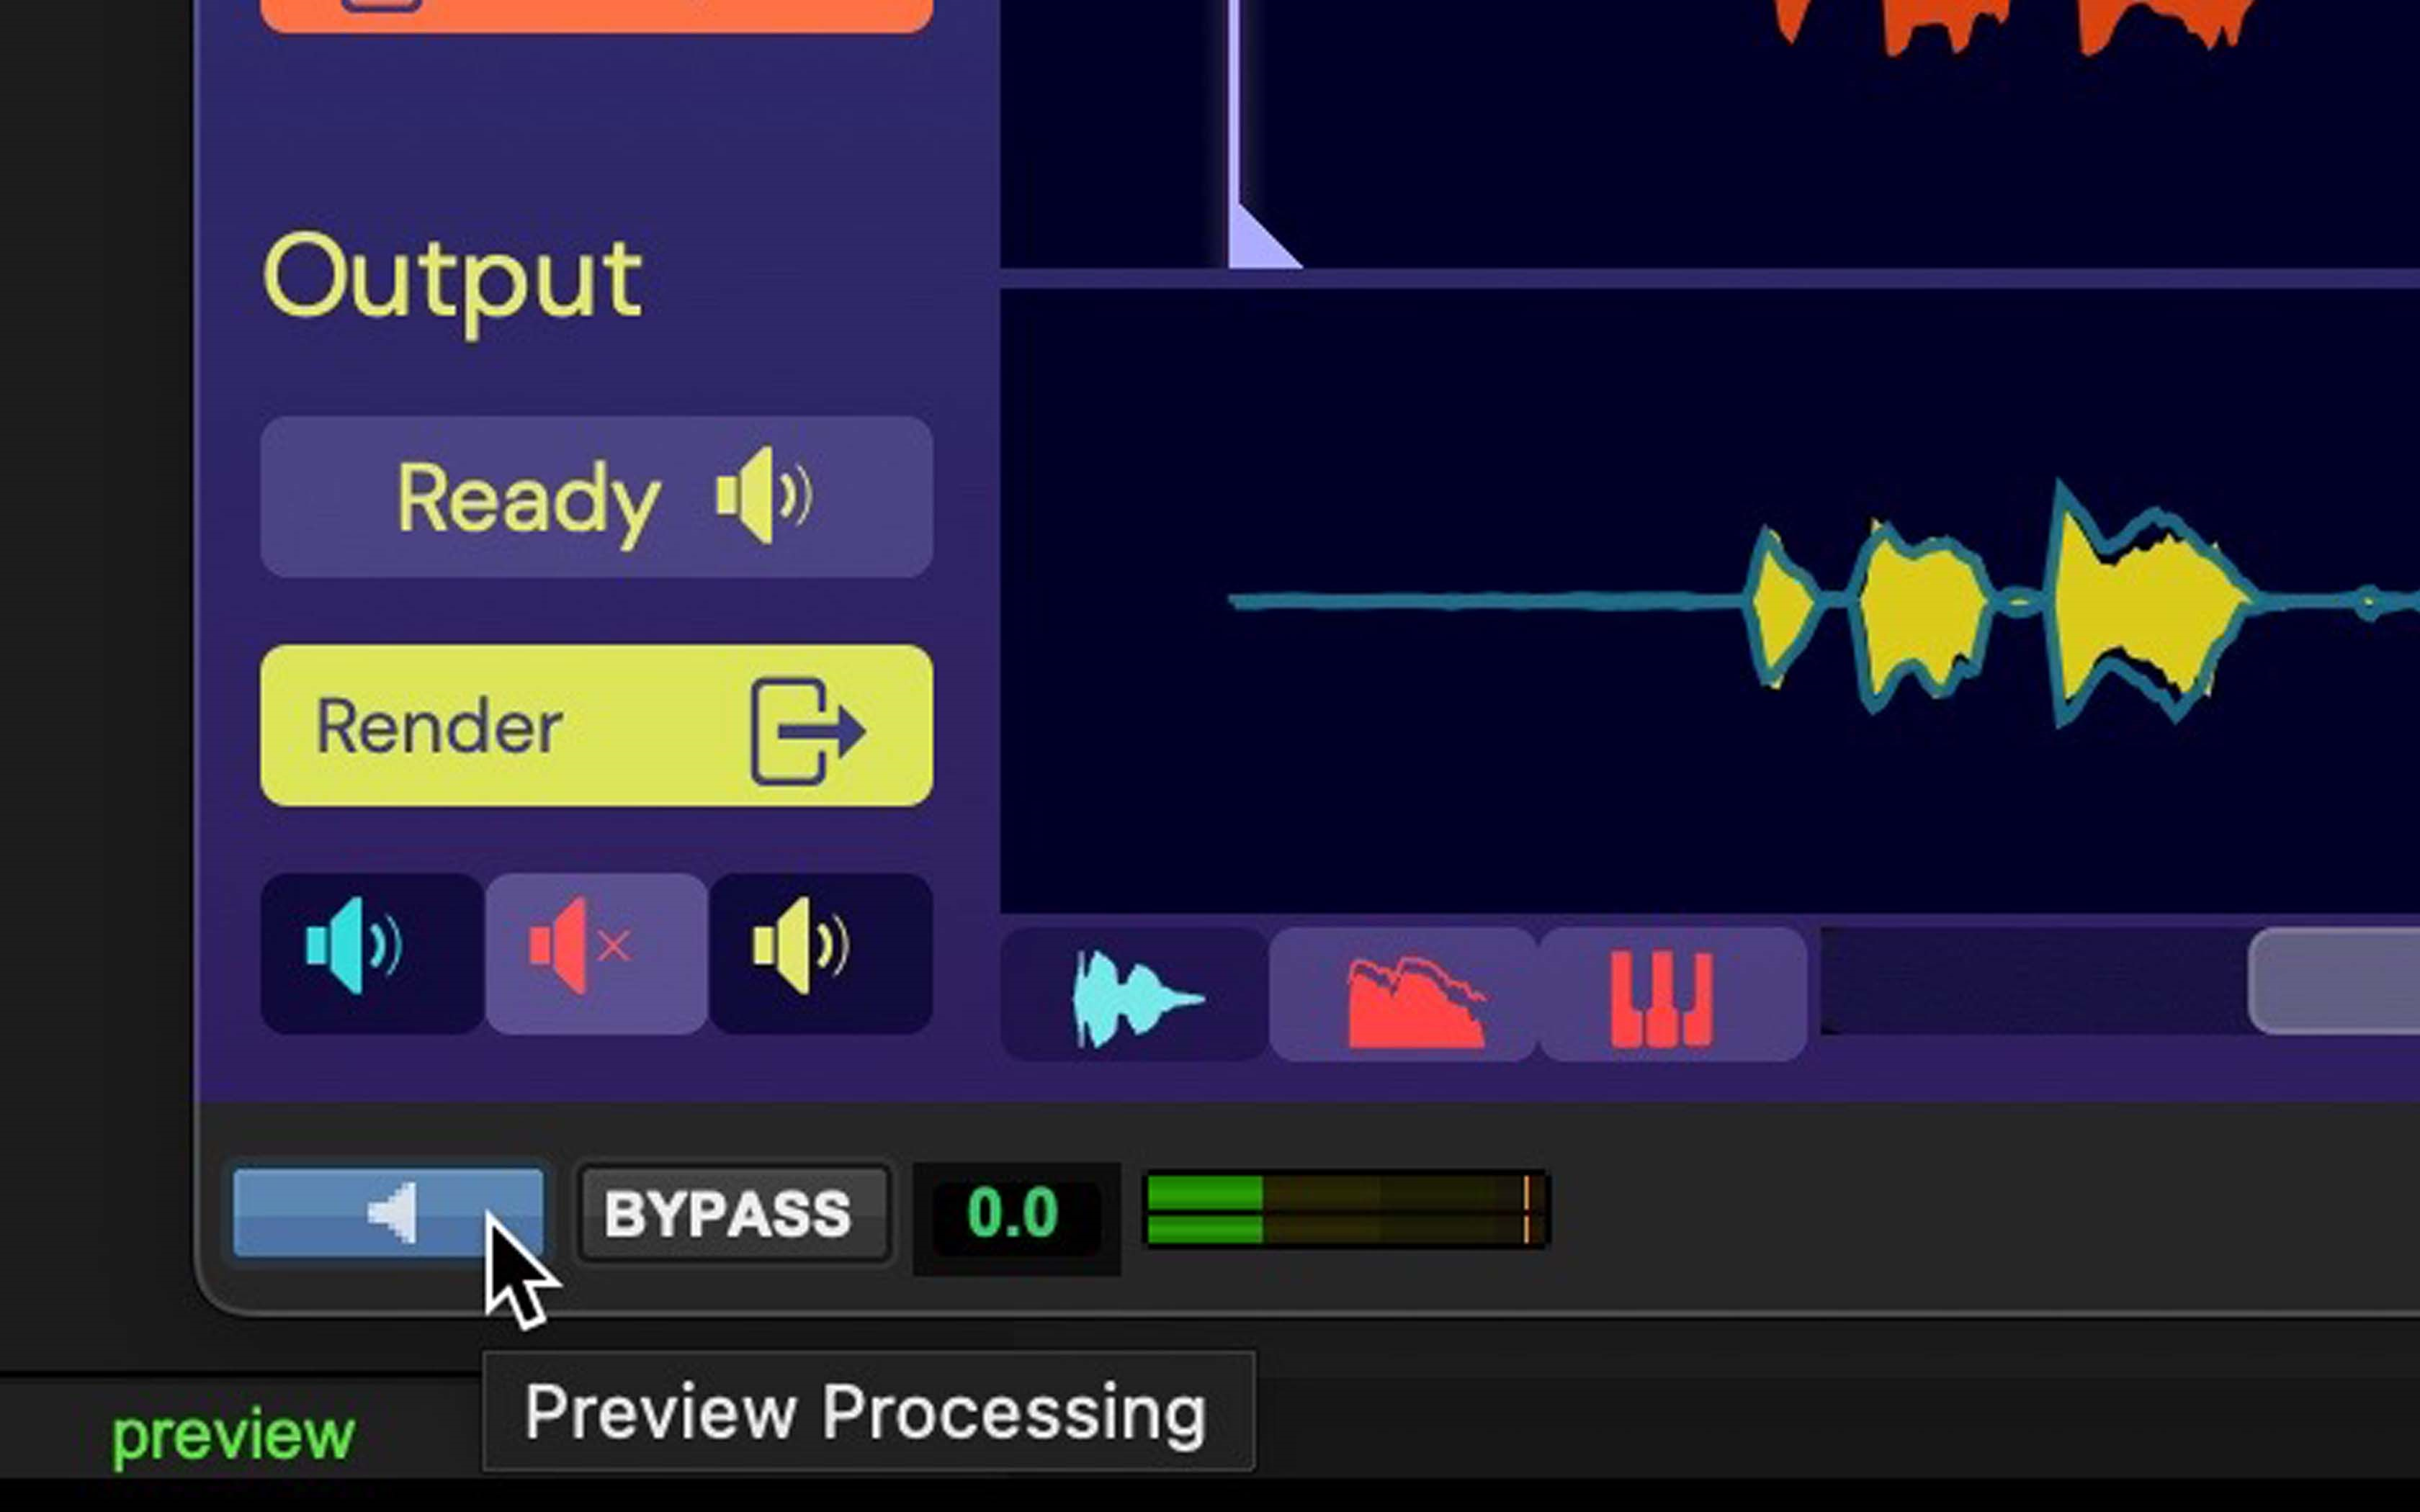
- Alternatively, click the Audio Suite Preview button (the tiny speaker at the bottom left) to audition the Guide and aligned Output together. Use the three colour- coded Solo buttons above to hear any combination of the input and output signals.
- You can also adjust the Max Difference controls in the Match Timing and Match Pitch sections to tighten or loosen the timing and pitch alignment applied by the preset. With each change, the Output is reprocessed and the Output waveform redrawn, and you can listen to it using the Preview button or click Render to return it to the Pro Tools session, as described above.


|
TIP: To store your control changes to use again, click the Preset dropdown menu and save them as a User Preset. Give them a name that tells you what is special about it. |
Other ways to Render the Output
NOTE: You can transfer the Output from VocAlign Ultra to replace the original Dub (as we did above) or transfer it onto any other track in Pro Tools by selecting a time range larger than a single sample anywhere on the target track and clicking the Render button. Or you can change the Audio Suite Track selection button (bottom right of picture "no track selected") to chose a Target track to render to.

|
CAUTION: Be sure to make the correct target track selection before hitting the Render button. Otherwise, it’s likely that you’ll still have a range selected on the Dub source track, which will be overwritten when the Render is performed. |
Process 'Female Dub GE'
Now we will process the Female Dub. This is the same pitch as the Guide, so use the Vocal – Double – Slightly Loose Timing & Pitch setting again, or try any others in the Vocal preset group.
Let's make sure you see all the controls this time. Press the Basic button to switch to show the full Advanced controls. These are explained in detail in the Using VocAlign Ultra section of this VocAlign Ultra User Guide.

Select the clip 'Female Dub GE' and press Dub Capture;.
Then repeat the auditioning process described above or render the Output back to Pro Tools to hear it.
|
|
If you are using the Pro Tools Preview to audition the output of VocAlign Ultra, and you change any controls while playing, you will either need to stop and restart the preview to hear the effect of the new settings- or if it has looped back, you must wait till it restarts the loop to hear the new settings. |
Examine the Pitch
Now let's look at the Pitch Profile display. Press the keyboard switch at the bottom left corner of the VocAlign Ultra interface.
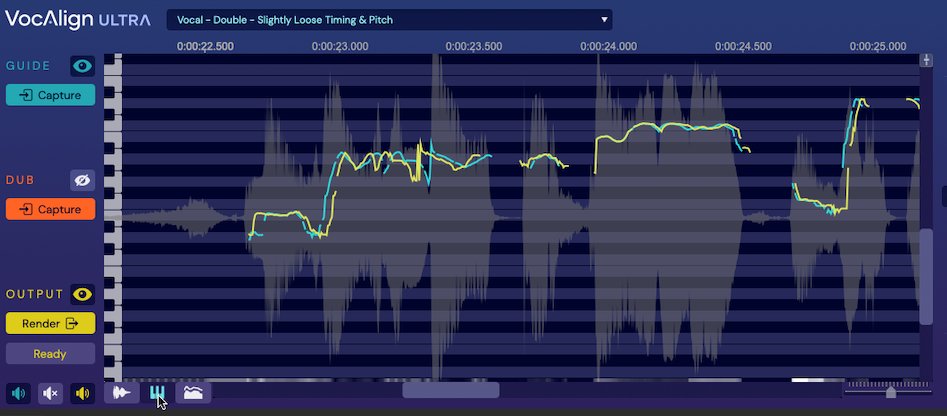
Then, activate and deactivate the 'eye' buttons to see the Guide and Dub Pitch traces, then the Guide and Output Pitch. Turn the Match Timing and Match Pitch Max Difference controls and observe the effects of tighter and looser settings on the traces.
Also, notice the white and gray patches along the bottom of the Pitch display. These show you the relative amount of processing being applied to the Dub at every point in time. Tighter settings will usually require more processing (whiter shading). Turn on the Dub pitch trace to see how different it is from the Output pitch and/or timing. Where there are big differences, the processing strength will be white.
The Formant Shift function can be used to add some character to the Output. Try lowering or raising it on the female voice.
Finally, when you like the sound of your Output, render the processed track back to the 'Female Dub GE Track' and listen to it with the Guide and other processed tracks.
Processing a Harmony Track
There are two Harmony tracks in this session: Male Harmony and Female Harmony.
- Harmonies are actually slightly easier to process, because you don't want to align their pitch to the Guide.
- Because of this, the Harmony presets only process timing.
- However, that does mean at least one of your harmony parts must be in tune. If you have doubles of that harmony, you can of course apply the timing and pitch of its Output to those doubles to match the new time aligned harmony with correct pitch.
Select the Preset Vocal – Harmony – Tight Timing
Select and Capture one of the Harmony Tracks.
Return it to Pro Tools.
Finally, do the same to the last harmony.
Audition the end result
If you have time aligned all the tracks to the Guide, and returned them over the original tracks, you can play them all together to hear the vast differerence you will have made with VocAlign Ultra in a very short time.
CONGRATULATIONS!!
Fixing problems
Protected Areas
There will be times when you want to exclude certain sections in the Dub from processing – when your Guide vocal jumps up an octave, or gets raspy and lower, but your Dub doesn't, for example. Or when there are different words or syllables in the Guide and Dub, which can throw the time alignment off, resulting in unnatural distortion of the Output timing. VocAlign Ultra's Protected Areas enable pitch, time or both to be kept unprocessed over any specified range within the Dub. We'll demonstrate this using the 'Tiny Heart' Pro Tools session – please download and open it.
- Follow the procedure described above to open VocAlign Ultra Audio Suite plug-in in Pro Tools. Before we process anything, listen to Tracks 2 and 3 from bars 27-35. You might want to raise the level of this track 3 to 4 dB to hear time and pitch issues in the high voice against the lead vocal.
- Now select in Pro Tools the Lead Vocal audio event and Capture it as the guide. If you are not using SmartAlign, highlight the track from bars 27-35 and Capture that as the Guide.
- Next select the preset: Vocal – Double – Slightly Loose Timing & Pitch.
- Lastly, select the Lead Vox High Chorus audio event and Capture that as the Dub. If you are not using SmartAlign, highlight bars 27-35 of the Lead Vox High Chorus audio event and Capture that as the dub.
- Render the Output back to the same Pro Tools track and listen to this selection in tracks 2 and 3. You can hear the time and pitch are closer. But if you listen to the Output Dub on its own, you can clearly hear the pitch of the Dub going awry on the word "again" at the end of the phrase, as it aligns the Dub with the raspy pitch drop in the Guide.
We can fix this by creating a Protected Area within the Dub – a range that maintains the original Dub’s pitch, timing or both.
For a visualisation of the signals' pitches, switch to the Pitch Profile View by clicking the keyboard button  below the main display, and zoom in on the very end of the Dub. Use the vertical slider at the right of the display and the Scale control
  above it. You’ll see the Guide (blue) pitch shows an octave drop when it gets ‘creaky’, which is transferred to the Dub and affects its pitch quality in the Output signal (the yellow trace).
Toggle the Match Pitch button off and on and you'll see the last section of the Output jump between the natural pitch of the Dub and the incorrectly aligned pitch.

- Switch back to the Waveform view by clicking the waveform button next to the Pitch Profile keyboard button.
- If you are in the Basic control display, click the Basic Control display button to switch to Advanced mode, then click the dividing bar labelled Protected Areas (if none have been created) between the Dub and Output waveforms at the start of the unwanted pitch drop to create a new Protected Area.
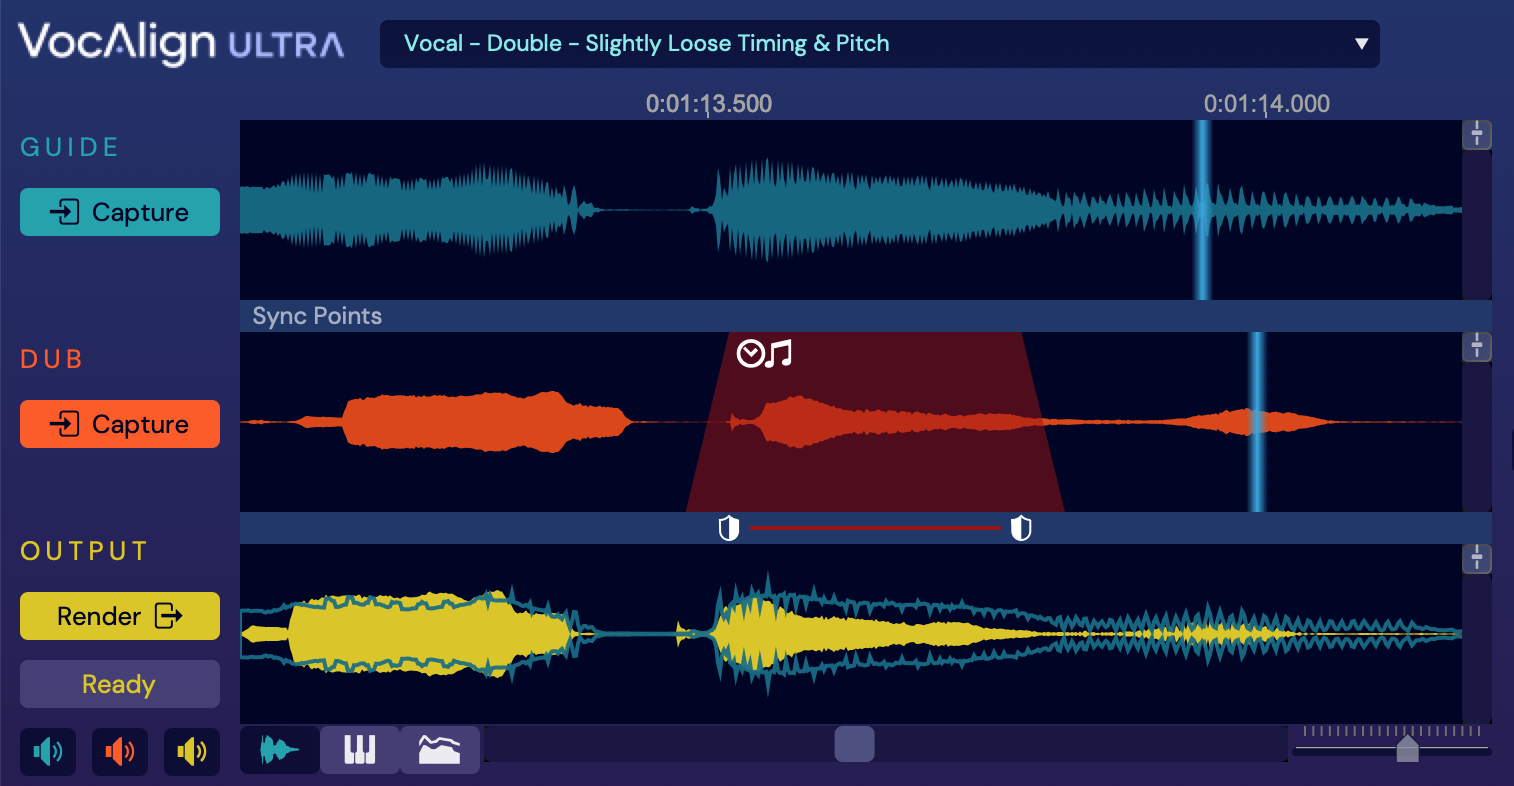
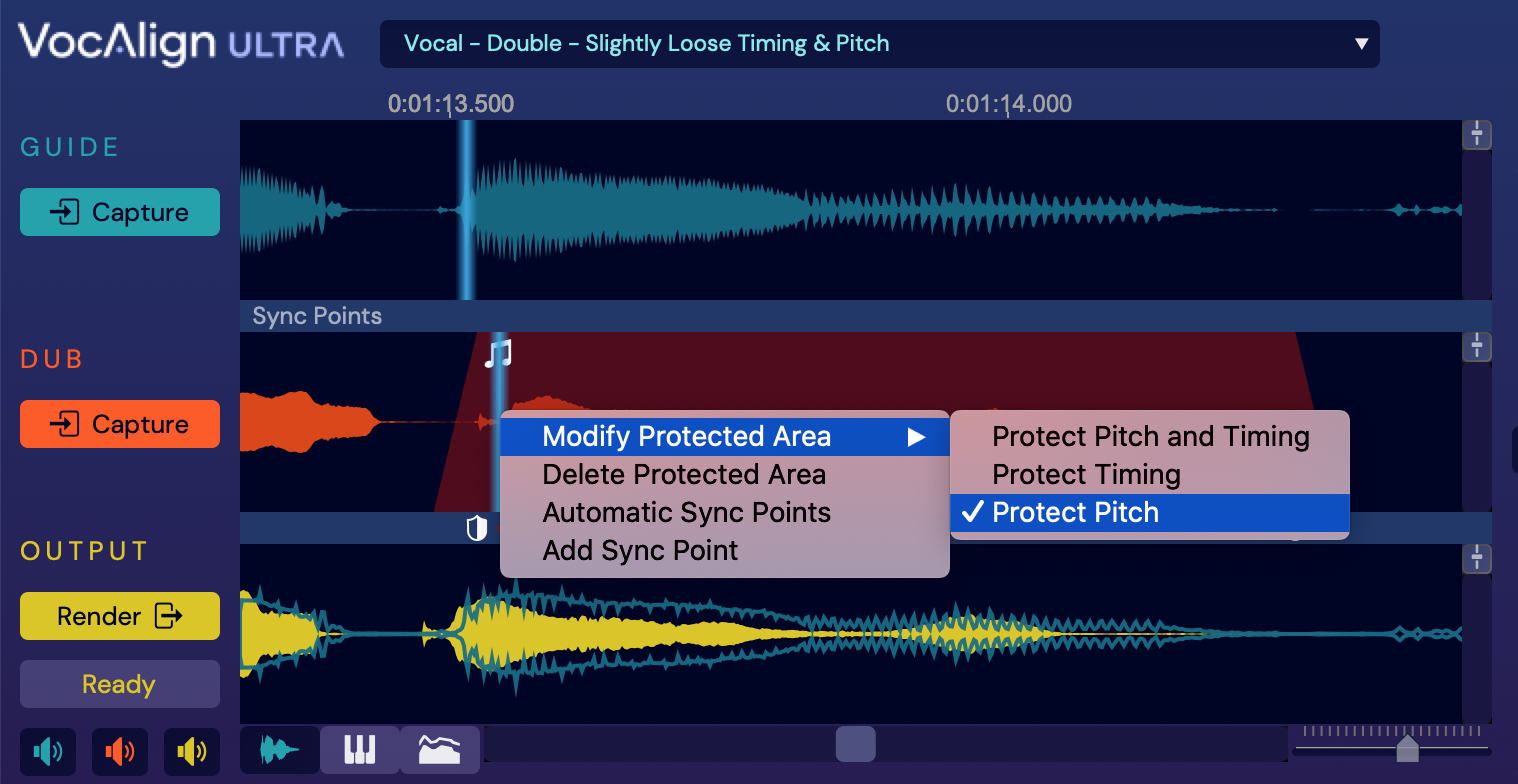
- Drag the ‘shield’ handle at the right hand end of the Protected Area to encompass the last ‘piece’ of the Dub waveform, then right-click in the Protected Area and select Modify Protected Area > Protect Pitch – now the timing will be aligned but the pitch won’t.
You can see this by going back to the Pitch Display and look at the yellow Output Pitch, now overlapping the red Dub pitch exactly because it is now protected from pitch changes (but not time changes).
As an exercise, work back through the Dub, adding further Protected Areas where required.
Sync Points
If you're getting small differences in timing caused by different words, sounds or delivery, you can correct them using Sync Points. These let you assign pairs of pointers to events in the Guide and Dub that should be time aligned if they are not. One of the pair is moved to a position in the Dub waveform and the other paired pointer is moved the a similar position in the Guide waveform, and the alignment engine does it's best to nudge the two points together, assuming the audio around that point in the Dub is amenable to being compressed or stretched by the required amount. Click here for more details on Sync Points and how to use them.
And finally…
There's always more to learn, so head to the sections of the full User Guide at the left in the Using VocAlign Ultra folder, for much more information on VocAlign Ultra's controls and displays, and for the latest videos and tips, click this link: VocAlign Ultra with Pro Tools .