
Downloads
VocAlign

Match the timing and pitch of vocal performances with unprecedented ease and control. An essential vocal processing plugin for any music producer.
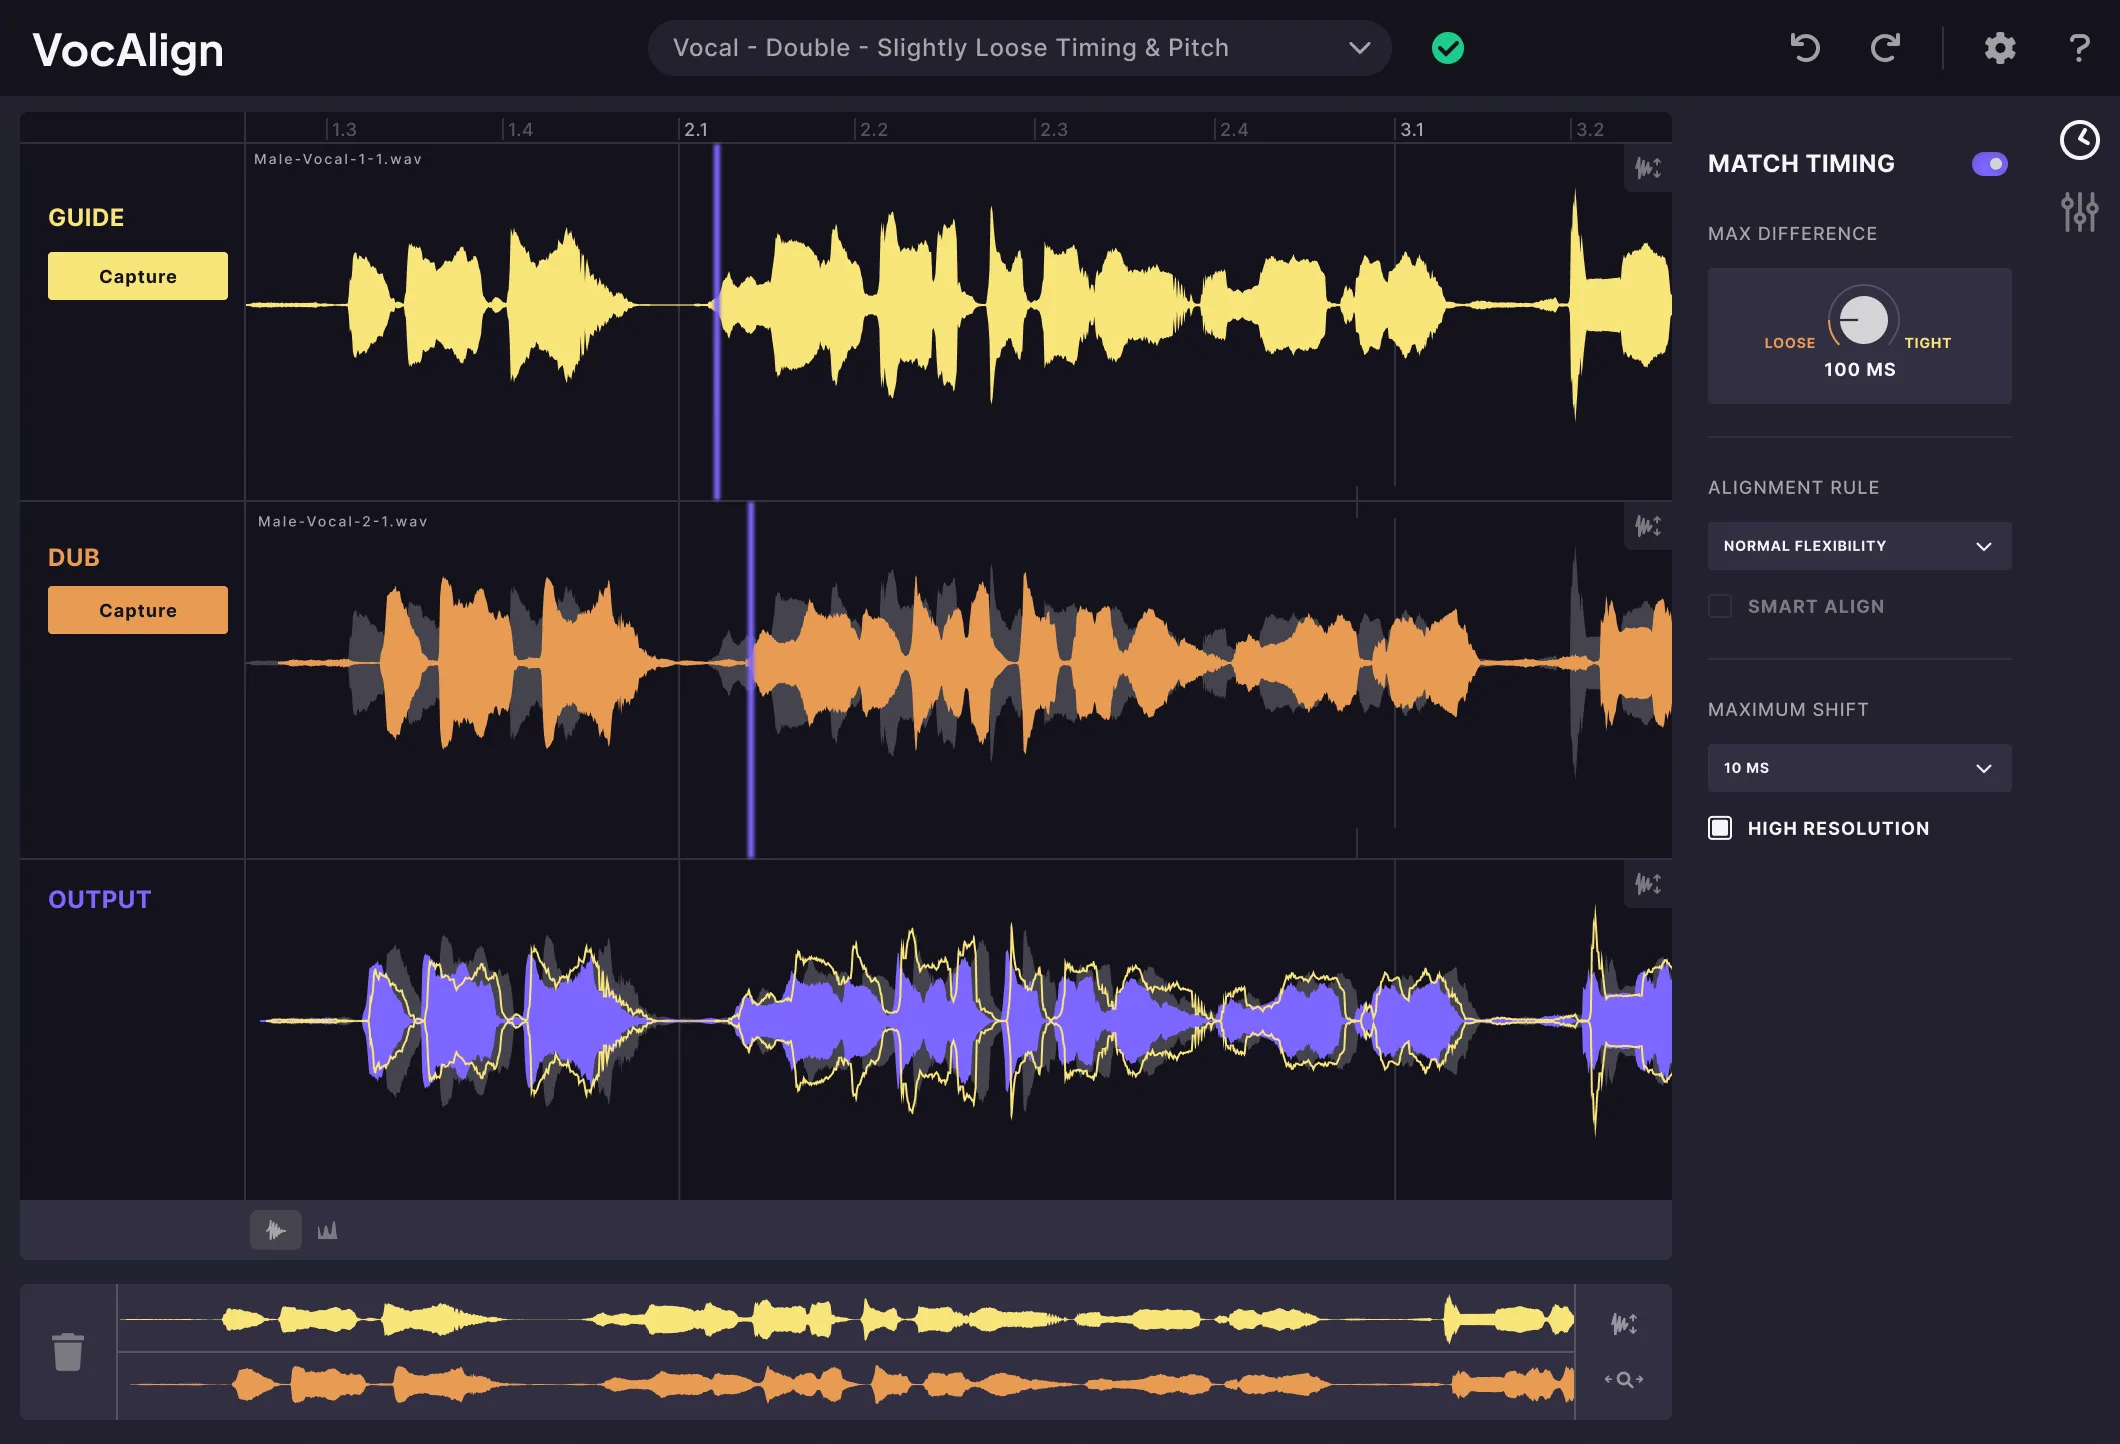
A streamlined version of our award-winning vocal alignment plugin that has become the industry standard for professional audio engineers.
RePitch
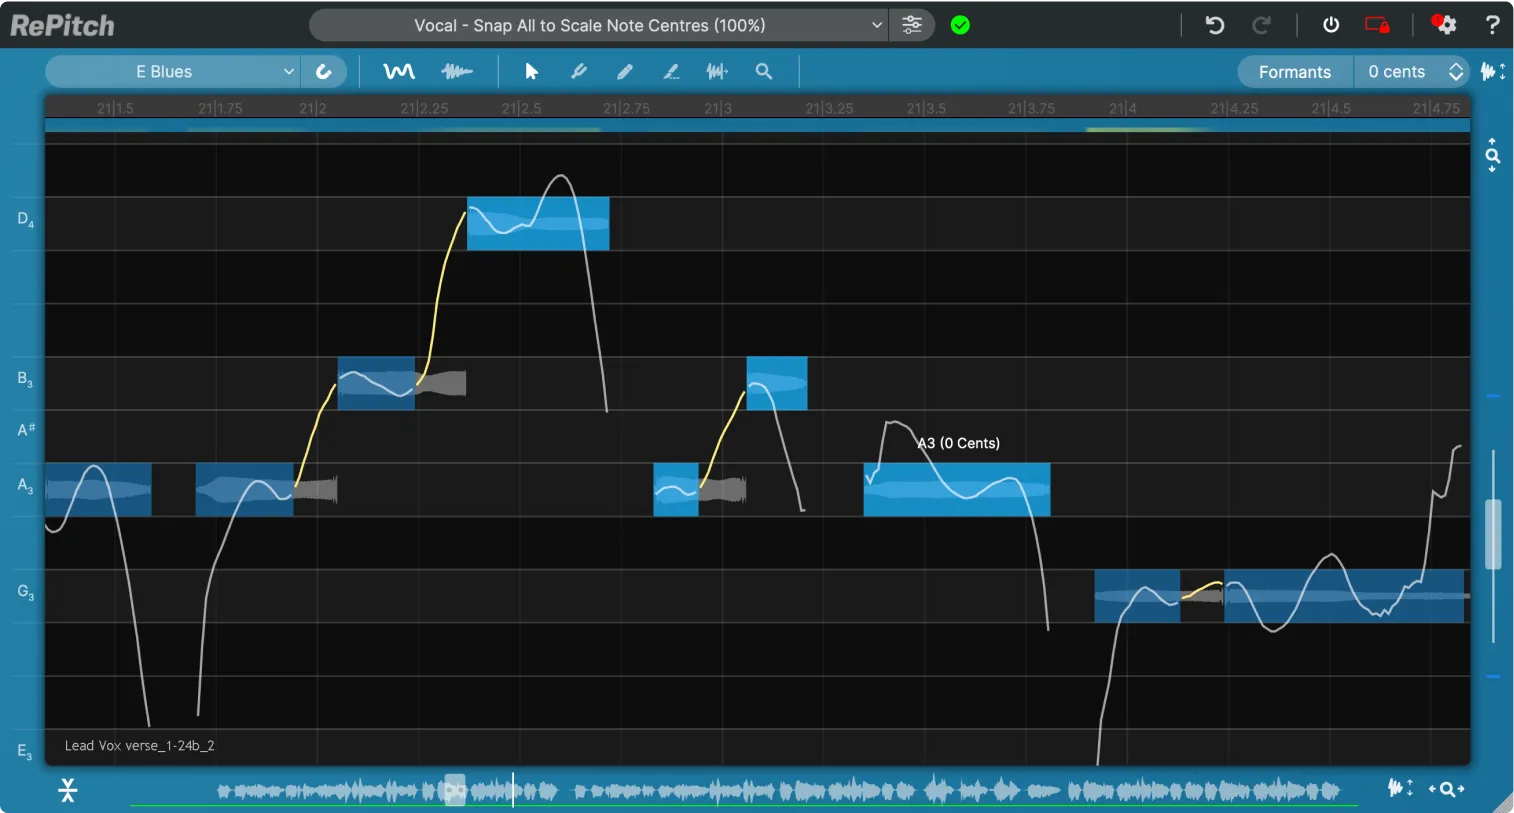
Get precise, natural-sounding performance tuning with the vocal processing plugin trusted by pros. Instantly snap vocals to any scale or make detailed pitch, timing or vibrato changes in seconds.

A streamlined version of our award-winning vocal processing tool that gives you essential pitch-correction technology in an easy-to-use vocal plugin.
Revoice Pro
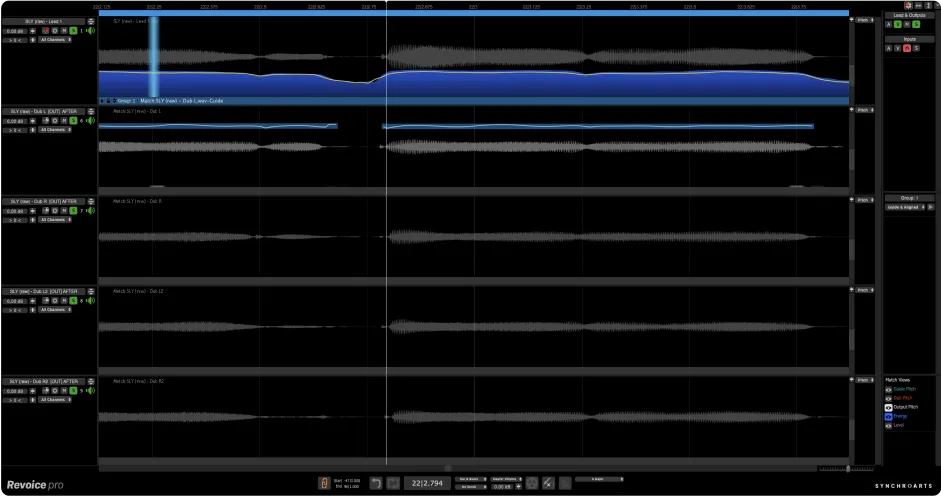
Experience the speed and ease of the world’s most advanced vocal processing software for professional-grade vocal alignment, precise pitch correction, and natural-sounding vocal doubles.
Click here to download legacy versions of our software