


%20(1).avif)
.avif)
.avif)
.avif)
Synchro Arts
Save hours in the studio with vocal processing software created specifically to enhance and simplify the processes of music producers and audio engineers.

In this video, let's take a brief moment to talk about some of the major enhancements and updates in VocAlign 6 Pro compared to VocAlign 5 Ultra.
First things first, let’s start off with the flagship feature—which is Pro Tools ARA compatibility. Simply selecting the clips in Pro Tools and holding Shift and Option gives us the ability to edit with VocAlign 6 Pro. This also works with VocAlign 6 Standard. From here, if you know the tracks you want to use as your guide and your dub, it’s simply a matter of selecting each one, and they are instantly available to do any processing you want.
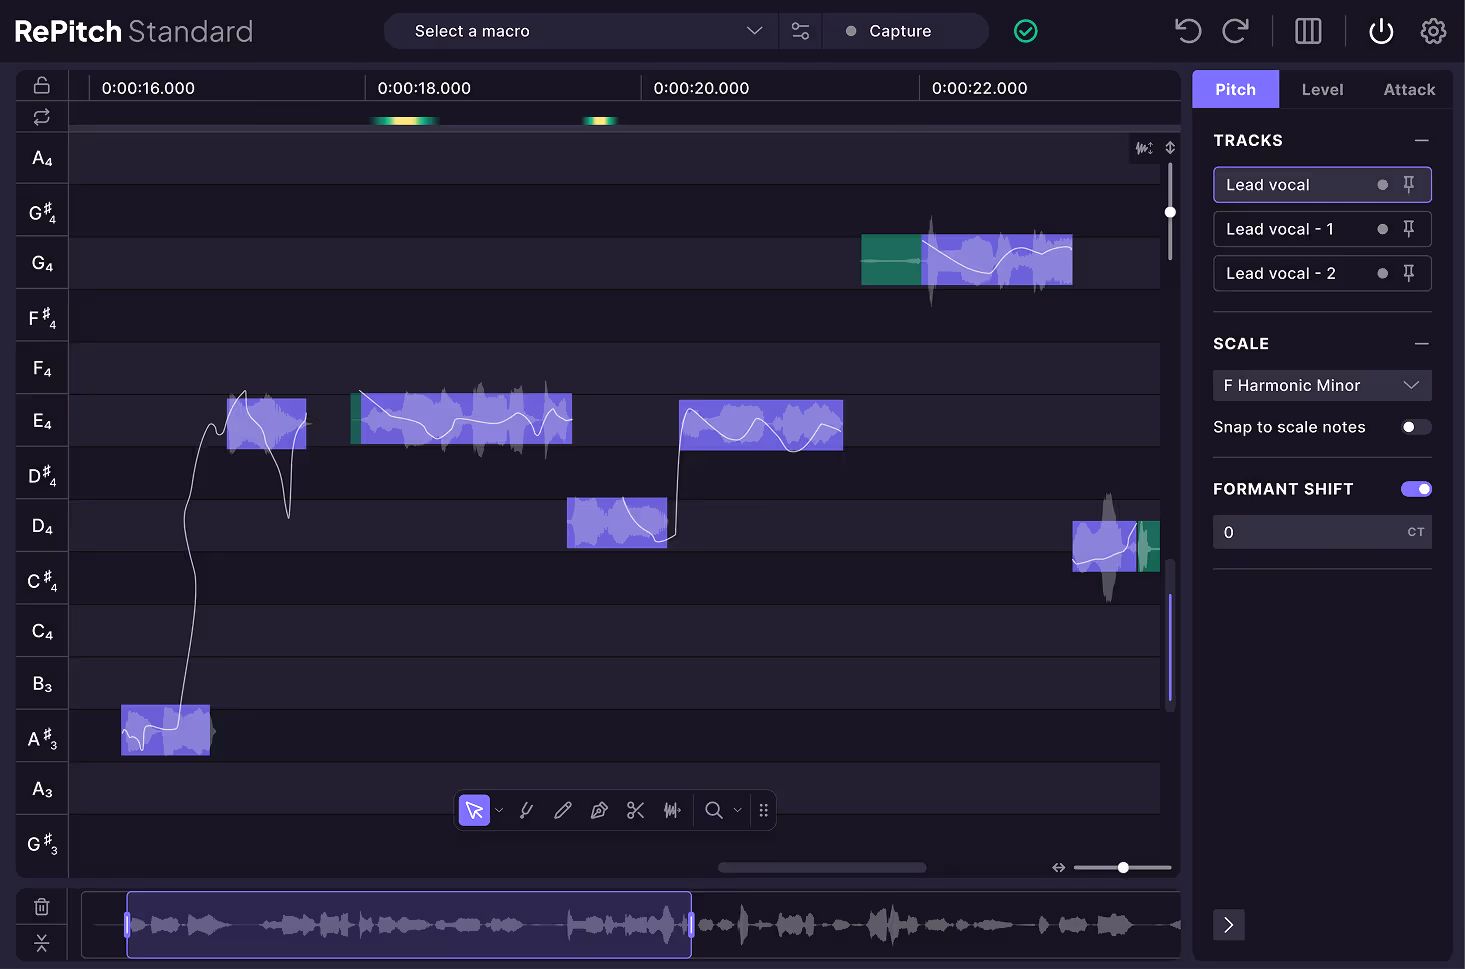
Also notice that both VocAlign 6 Pro and VocAlign 6 Standard have been updated with a dark mode GUI. Depending on your lighting environment—and especially if you’re working long studio sessions—this can be a bit easier on the eyes when you're staring at screens for two, three, four, or five hours.
In addition to that, we also have the ability to show and hide different panels. If you only want to work with the timing panel, you can bring that up. If you momentarily need to see the pitch, you can bring that up as well. Then there's the "Other" panel. This is really useful if you're working on smaller laptop screens with limited screen real estate—or in this case, I’m working on a 27-inch 4K Ultra HD monitor, so I have plenty of space. I can resize the editor and bring in all the displays I need to get the job done.
We also have undo and redo functionality. So if you’ve made a couple of changes and want to test different settings, you can quickly step backward or forward. That can be really useful when making quick comparisons.
Another improvement is in the sync points. If you find yourself in a situation—rare with VocAlign Pro—where something doesn’t line up exactly how you’d like, you can zoom in, right-click, and add a sync point. You can then designate exactly where that sync point should go. This is especially helpful if there's a missing word or syllable, and you need to anchor the alignment. And of course, it’s easy to clear all sync points if needed.
Next up, let’s talk about Smart Pitch. In this case, I have a female lead vocal and a male lead vocal in unison. Those two have already been processed, and if we play them together, the timing and tuning from the female lead has been imparted onto the male lead.
Now we have two harmony tracks. The idea here is to get the timing from the lead vocal, but also fix the slightly off tuning. With the new Smart Pitch mode, we have a preset that handles this, along with a new way to capture tracks using process groups. Anytime you want to capture two or more tracks using the same settings, you can go to the dub track panel and choose "New Group for Next Capture." You’ll see this update to "Group 1."
Let’s go ahead and capture. On the main screen, if I select any of these tracks in my DAW, VocAlign Pro follows along. This works in most DAWs that support ARA compatibility. If I bring up the pitch panel, you’ll see the settings applied to both tracks automatically.
Now, let’s quickly walk through the different Smart Pitch modes. We have three:
Since we’re working with harmony tracks, using “Match All to Guide” would force them to match pitch to the lead—which we don’t want. So we use “Match Unison Only” to align the timing while preserving the harmonic content. If we want to do a light tuning pass on those harmonies, we can switch to “Match Unison and Tune Non-Unison.”
Let’s solo the background harmonies and apply that preset. Now if we open the pitch display and zoom out, we can see subtle shifts in tuning. It’s very slight, but both vocals have been tuned to 100% based on the nearest semitone. So if your performance is already pretty solid, this mode helps fine-tune everything into place.
At the bottom, you’ll notice a glowing white line—that’s the heat map in VocAlign 6 Pro. It shows where processing is happening. If we switch to a different Smart Pitch setting, like “Match All to Guide,” and set it to Absolute mode, we see a very solid glow—indicating a lot of processing. That’s because we’ve just time-aligned and pitch-matched two harmony tracks to a female lead.
We’ll switch it back to “Nearest Octave” and “Match Unison and Tune Non-Unison,” and set the algorithm to the brand-new Mode 3.
That sounds great. If we play everything in context: “Fight all your fire, carry your pain until it’s light...”
In terms of working with non-ARA-based DAWs like Ableton Live, it’s just a matter of selecting your mouse cursor on the desired track, holding the Shift modifier, enabling capture on both tracks, and pressing play. Once the tracks are captured into VocAlign 6 Pro from within Ableton, you can immediately begin editing and auditioning everything in real-time using VocAlign Pro’s cache.
So that’s a super quick look at some of the major improvements from VocAlign 5 Ultra to VocAlign 6 Pro. Hope you enjoyed this video, and we’ll catch you in the next one. Cheers!
Save hours in the studio with vocal processing software created specifically to enhance and simplify the processes of music producers and audio engineers.
